Prep Time: 30 minutes | Cook Time: 10 minutes | Total Time: 2 hours 40 minutes
Servings: 20 truffles | Difficulty: Easy
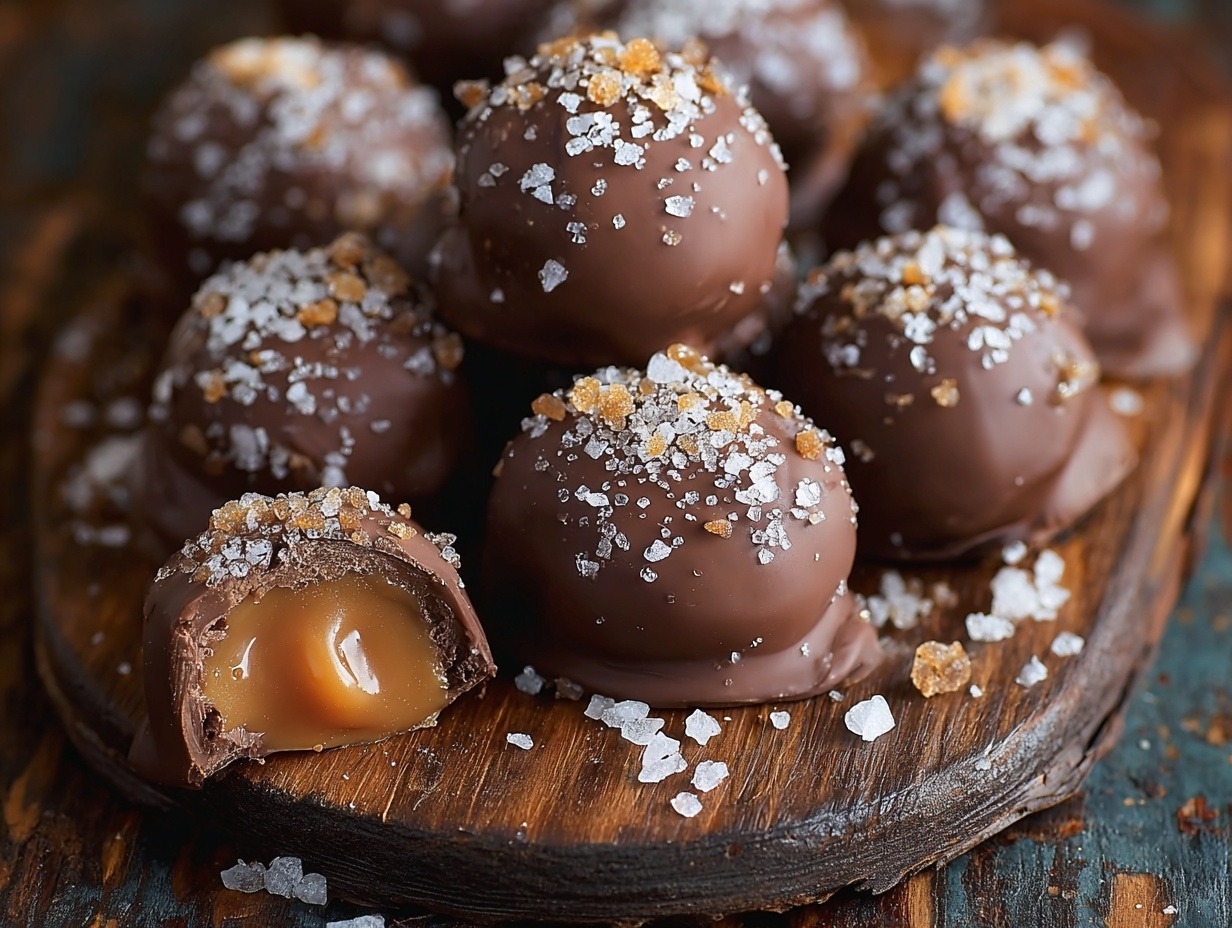
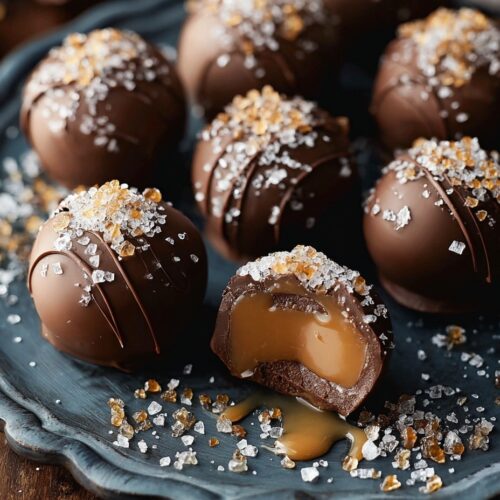
Imagine biting into a luxurious chocolate truffle that reveals a silky-smooth salted caramel center—sweet, salty, and absolutely divine. These salted caramel truffles are the ultimate homemade candy that looks impressively gourmet but is surprisingly simple to create in your own kitchen. The combination of buttery homemade caramel with a hint of sea salt, enrobed in rich dark chocolate and finished with cocoa powder or flaky salt, creates an irresistible treat that melts in your mouth. Whether you’re preparing elegant gifts for the holidays, creating special treats for Valentine’s Day, or simply indulging in a luxurious dessert, these truffles deliver restaurant-quality results every time. The best part? You only need seven basic ingredients and a few hours to create candy that rivals any expensive chocolatier.
Table of Contents
Why You’ll Love This Salted Caramel Truffles Recipe
These homemade salted caramel truffles offer the perfect balance of sweet and salty flavors wrapped in rich dark chocolate coating. With just 30 minutes of active prep time and simple techniques, even beginner candy makers can achieve professional-looking results. The melt-in-your-mouth texture comes from buttery caramel that’s perfectly smooth and never grainy. These truffles are endlessly customizable—add nuts for crunch, experiment with different chocolate types, or try flavored extracts for unique variations. Perfect for gift-giving during holidays, they store beautifully for up to two weeks in the refrigerator.
What You Need for Salted Caramel Truffles
Essential Ingredients for Homemade Caramel
- 1 cup granulated sugar – creates the caramel base through caramelization
- 6 tablespoons unsalted butter – cut into pieces, adds richness and smooth texture
- 1/2 cup heavy cream – room temperature prevents seizing, creates silky caramel
- 1 teaspoon sea salt – balances sweetness and enhances caramel flavor
- 1 teaspoon pure vanilla extract – adds depth and aromatic warmth
For the Chocolate Coating
- 8 ounces dark chocolate – finely chopped, 60-70% cacao works best for coating
- Cocoa powder – unsweetened, for dusting finished truffles
- Crushed sea salt – optional alternative coating for elegant finish
How to Make Salted Caramel Truffles (Step-by-Step)
Step 1: Creating Perfect Homemade Caramel
- Prepare ingredients (3 minutes): Cut butter into tablespoon-sized pieces and measure out heavy cream. Have everything ready before starting as caramel moves quickly.
- Melt the sugar (5-7 minutes): Place granulated sugar in heavy-bottomed saucepan over medium heat. Stir constantly with heat-resistant rubber spatula as sugar begins to melt. (Sugar will clump before melting—keep stirring.)
- Achieve amber color (2-3 minutes): Continue stirring until sugar is completely melted and turns golden amber color, similar to honey. (Watch carefully to prevent burning.)
- Add butter carefully (1 minute): Remove from heat and add butter pieces, stirring until completely melted and incorporated. (Mixture will bubble vigorously—this is normal.)
- Pour in cream (1 minute): Slowly pour heavy cream into caramel while stirring constantly. Mixture will bubble dramatically. Return to heat and allow to boil for exactly 1 minute. (This ensures proper consistency.)
- Finish caramel (2 minutes): Remove from heat and stir in sea salt and vanilla extract until completely combined. Pour into heat-safe bowl and let cool completely to room temperature, about 1 hour.
Step 2: Forming Caramel Centers
- Shape caramel balls (10 minutes): Once caramel is completely cool and firm enough to handle, use a small cookie scoop or spoon to portion caramel. Roll each portion between your palms to form smooth 1-inch balls. (Lightly oil hands if caramel is sticky.)
- Freeze until firm (2 hours): Place caramel balls on parchment-lined baking sheet and freeze for at least 2 hours until completely solid. (Firm centers are essential for easy chocolate dipping.)
Step 3: Dipping in Chocolate
- Melt chocolate perfectly (3 minutes): Finely chop dark chocolate and melt in double boiler over simmering water, stirring frequently until smooth. Alternatively, microwave in 30-second intervals, stirring between each. (Chocolate should be warm but not hot.)
- Dip frozen caramels (10 minutes): Working quickly, remove 3-4 caramel balls from freezer at a time. Using fork or dipping tool, dip each ball into melted chocolate, turning to coat completely. Let excess chocolate drip off.
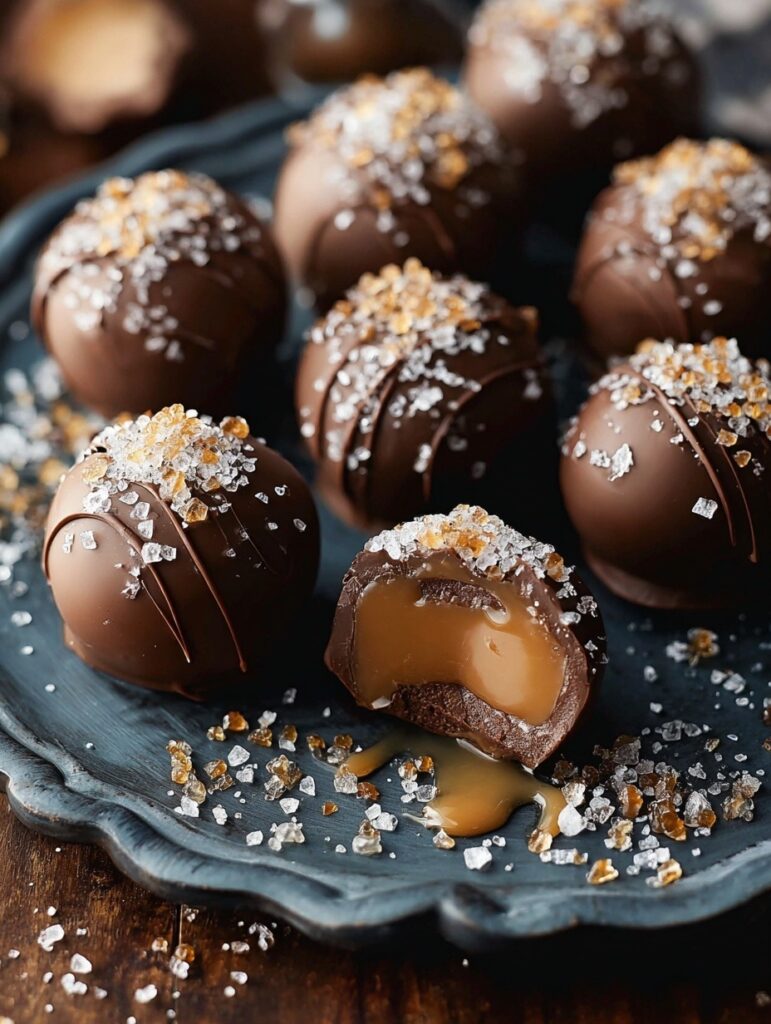
- Apply coating (5 minutes): Immediately roll chocolate-coated truffle in cocoa powder for rustic finish, or place on parchment paper and sprinkle with crushed sea salt for elegant appearance. (Work quickly before chocolate sets.)
- Set the truffles (30 minutes): Place finished truffles on parchment-lined tray and refrigerate until chocolate is completely set and firm to touch.
Easy Salted Caramel Truffles
Equipment
- Heavy-bottomed saucepan
- Rubber spatula or wooden spoon
- Candy thermometer (optional)
- Double boiler or microwave-safe bowl
- Baking sheet
- Parchment paper
- Small cookie scoop
Ingredients
For the Salted Caramel Centers
- 1 cup granulated sugar creates caramel base through caramelization
- 6 tablespoons unsalted butter cut into pieces for easier melting
- 1/2 cup heavy cream room temperature prevents seizing
- 1 teaspoon sea salt balances sweetness, use flaky sea salt for best results
- 1 teaspoon pure vanilla extract adds depth and aromatic warmth
For the Chocolate Coating
- 8 ounces dark chocolate finely chopped – 60-70% cacao recommended
- unsweetened cocoa powder for dusting – about 1/4 cup
- crushed sea salt optional alternative coating for elegant finish
Instructions
- Cut butter into tablespoon-sized pieces and measure heavy cream. Have all ingredients ready as caramel making moves quickly.
- Place granulated sugar in heavy-bottomed saucepan over medium heat. Stir constantly with heat-resistant rubber spatula as sugar begins to melt. Sugar will clump before melting—continue stirring. Cook for 5-7 minutes total.
- Continue stirring until sugar is completely melted and turns golden amber color, similar to honey. Watch carefully to prevent burning. This takes about 2-3 additional minutes.
- Remove from heat and carefully add butter pieces, stirring until completely melted and incorporated. Mixture will bubble vigorously—this is normal.
- Slowly pour heavy cream into caramel while stirring constantly. Mixture will bubble dramatically. Return to heat and allow to boil for exactly 1 minute to ensure proper consistency.
- Remove from heat and stir in sea salt and vanilla extract until completely combined. Pour caramel into heat-safe bowl and let cool completely to room temperature, about 1 hour.
- Once caramel is completely cool and firm, use small cookie scoop or spoon to portion caramel. Roll each portion between your palms to form smooth 1-inch balls. Lightly oil hands if caramel is sticky. This makes about 20 balls.
- Place caramel balls on parchment-lined baking sheet and freeze for at least 2 hours until completely solid. Firm centers are essential for easy chocolate dipping.
- Finely chop dark chocolate and melt in double boiler over simmering water, stirring frequently until smooth. Alternatively, microwave in 30-second intervals, stirring between each. Chocolate should be warm but not hot.
- Working quickly, remove 3-4 caramel balls from freezer at a time. Using fork or dipping tool, dip each ball into melted chocolate, turning to coat completely. Let excess chocolate drip off.
- Immediately roll chocolate-coated truffle in cocoa powder for rustic finish, or place on parchment paper and sprinkle with crushed sea salt for elegant appearance. Work quickly before chocolate sets.
- Place finished truffles on parchment-lined tray and refrigerate for at least 30 minutes until chocolate is completely set and firm to touch. Serve chilled or at room temperature.
Notes
Expert Tips for the Best Salted Caramel Truffles
Use a candy thermometer if you’re nervous about caramelizing sugar—aim for 340°F for perfect amber color. Keep heavy cream at room temperature before adding to prevent temperature shock that can cause caramel to seize. Work in small batches when dipping to keep caramel balls frozen—this prevents melting and ensures clean chocolate coating. For ultra-smooth chocolate coating, temper your chocolate or add 1 tablespoon coconut oil to melted chocolate for glossy finish. If caramel becomes too hard to roll, let it sit at room temperature for 10-15 minutes to soften slightly. Store truffles in single layers separated by parchment paper to prevent sticking. If you love these, try our Cream Cheese Chocolate Truffles for another decadent truffle variation.
How to Store and Serve Salted Caramel Truffles
Store these gourmet salted caramel truffles in an airtight container in the refrigerator for up to 2 weeks, layering them between parchment paper to prevent sticking. For longer storage, freeze truffles in single layer on baking sheet, then transfer to freezer-safe container for up to 3 months. For best flavor and texture, let truffles sit at room temperature for 10-15 minutes before serving—this allows caramel to soften slightly for that perfect melt-in-your-mouth experience. These make stunning gifts when packaged in decorative boxes lined with tissue paper or clear cellophane bags tied with ribbon. Serve alongside coffee or champagne for elegant after-dinner treats.
Salted Caramel Truffles Recipe Variations You’ll Love
Create nutty caramel truffles by folding 1/2 cup finely chopped toasted pecans, almonds, or hazelnuts into cooled caramel before forming balls. Try flavored truffles by replacing vanilla with 1 teaspoon hazelnut extract, almond extract, or orange extract for unique flavor profiles. Make milk chocolate truffles by using milk chocolate instead of dark chocolate for sweeter, milder coating. Add spicy kick with 1/4 teaspoon cayenne pepper or cinnamon mixed into caramel for sophisticated heat. Create white chocolate drizzle by melting white chocolate and drizzling over finished dark chocolate truffles for elegant contrast. For more chocolate treats, check out our Fudgy Chocolate Brownie Cookies and Chocolate Cherry Cookies.
FAQ About Salted Caramel Truffles
Can I make salted caramel truffles in advance?
Absolutely! These truffles are perfect make-ahead treats. Prepare them up to 2 weeks before serving and store in the refrigerator, or make them up to 3 months ahead and freeze. They’re ideal for holiday prep and gift-giving since they actually improve in flavor as they sit.
How do I know when the caramel is ready?
Your caramel should be golden amber color similar to honey or dark maple syrup. It will bubble vigorously when you add the cream—this is normal and means you’ve achieved the right temperature. The mixture should coat the back of a spoon when finished and will thicken as it cools.
Why is my caramel grainy instead of smooth?
Grainy caramel happens when sugar crystallizes during cooking. To prevent this, avoid stirring once all sugar has melted, make sure your pan and utensils are completely clean, and don’t let any undissolved sugar crystals remain on pan sides. Using a wet pastry brush to wipe down sides helps prevent crystallization.
Can I use milk chocolate instead of dark chocolate?
Yes! Milk chocolate creates a sweeter, milder coating that many people prefer. Semi-sweet chocolate also works beautifully. Choose chocolate with at least 40% cacao content for best melting and coating properties. The flavor will be less intense but equally delicious.
Final Thoughts on This Salted Caramel Truffles Recipe
These easy salted caramel truffles prove that gourmet chocolate candy is absolutely achievable at home with simple ingredients and straightforward techniques. The combination of buttery caramel, flaky sea salt, and rich dark chocolate creates a sophisticated flavor profile that impresses every time. Whether you’re gifting them during holidays, serving them at dinner parties, or treating yourself to homemade luxury, these truffles deliver five-star results. The recipe is endlessly adaptable to your preferences, making it perfect for experimenting with different flavors and coatings. Once you master this technique, you’ll never want to buy expensive truffles again. Love this recipe? Save it to your Pinterest boards and follow us on Pinterest at for more amazing candy and dessert recipes that make every occasion special!