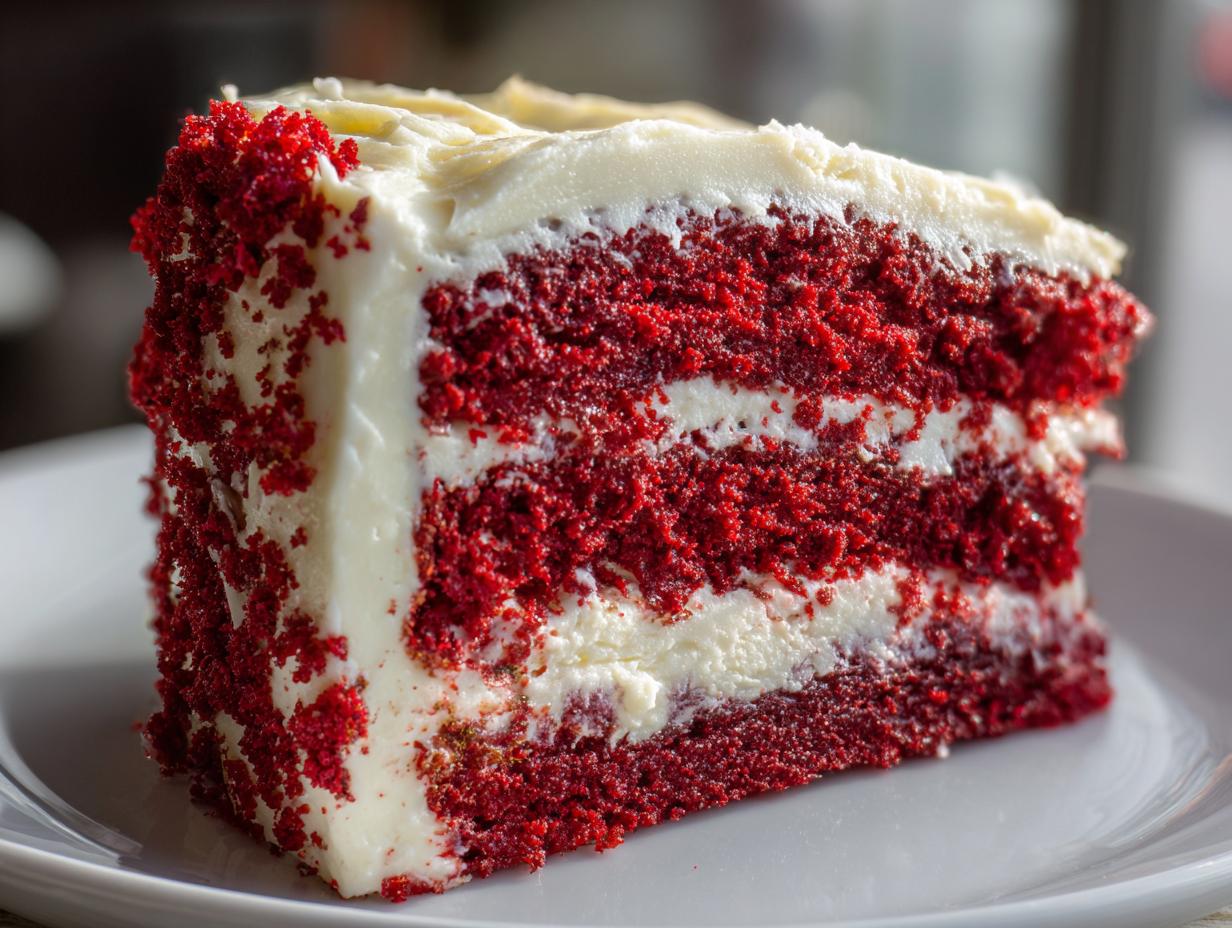
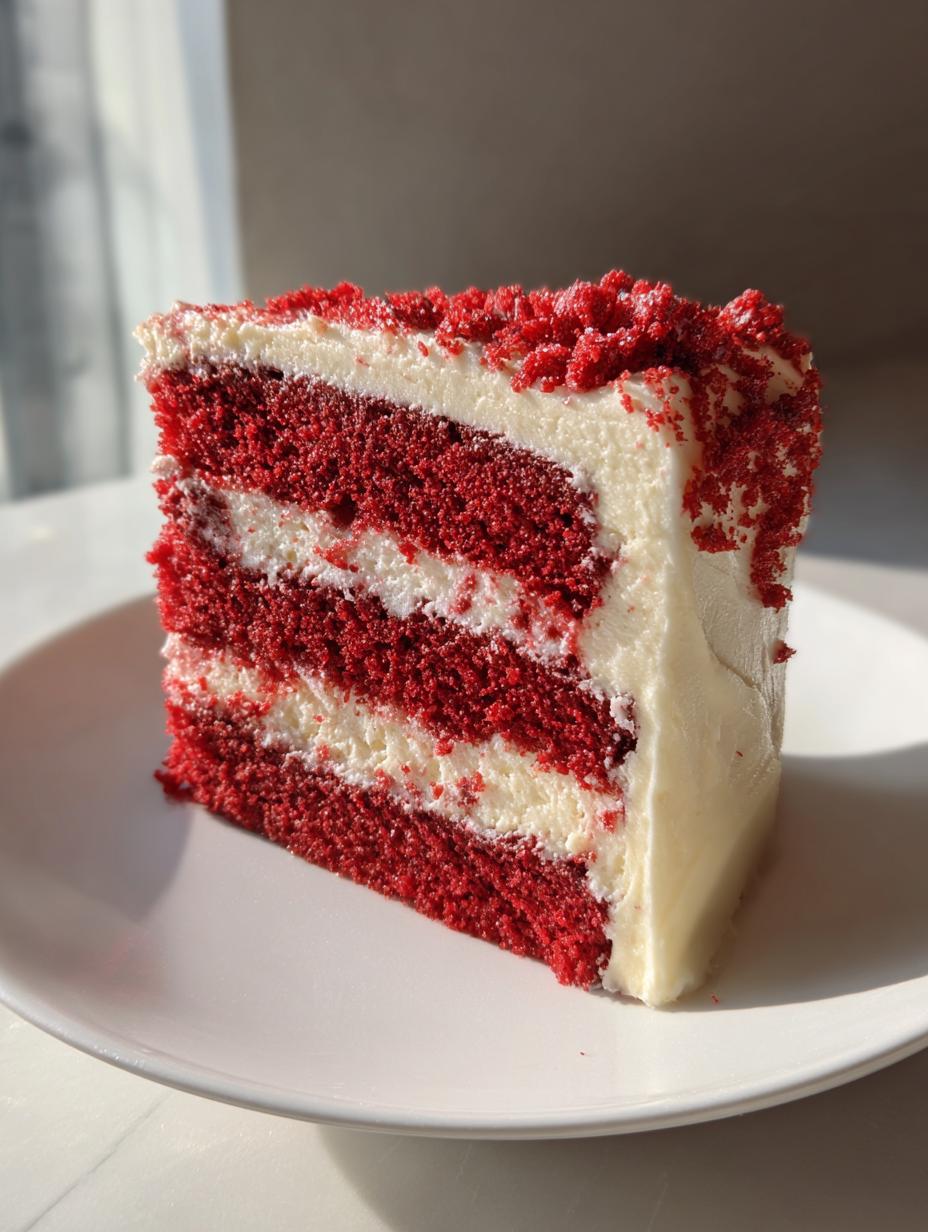
There’s just something magical about a *Red Velvet Christmas Cake* that makes the holiday season feel extra special! With its vibrant crimson hue and rich, velvety texture, this cake is not just a feast for the eyes but also a delight for the taste buds. It’s the kind of dessert that demands to be the center of attention on your holiday table, sparking joy and nostalgia with every slice. I love how this cake combines the classic flavors of chocolate and vanilla with a hint of tanginess from buttermilk, making it perfect for festive gatherings. Trust me, when you serve this stunning cake, it will become the highlight of your holiday celebrations, bringing smiles and sweet memories to your loved ones. So, let’s dive into making this beautiful treat that’s sure to impress everyone!
Ingredients List
To whip up this delightful *Red Velvet Christmas Cake*, you’ll need a mix of simple ingredients that come together to create something truly festive. Here’s what you’ll gather:
- For the Cake:
- 2 cups all-purpose flour
- 1 cup granulated sugar
- 1 cup vegetable oil
- 1 cup buttermilk (make sure it’s at room temperature for better mixing)
- 2 large eggs
- 2 tbsp red food coloring (yes, the more vibrant, the better!)
- 1 tsp vanilla extract
- 1 tsp baking soda
- 1 tsp vinegar (this adds a lovely tang that really enhances the flavor)
- For the Frosting:
- 1 cup cream cheese (softened, so it mixes smoothly)
- 1/2 cup unsalted butter (also softened – this is key to a creamy frosting)
- 4 cups powdered sugar
- 1 tsp vanilla extract
Gather these ingredients, and you’ll be well on your way to creating a cake that’s as delicious as it is beautiful. Don’t forget to have fun mixing and getting a little festive in the kitchen!
How to Prepare Red Velvet Christmas Cake
Now that you’ve gathered all your ingredients, it’s time to bring this *Red Velvet Christmas Cake* to life! Follow these steps, and I promise you’ll be rewarded with a stunning dessert that’s as delicious as it is festive.
Preparing the Cake Layers
First, preheat your oven to 350°F (175°C). While it’s warming up, grab two 9-inch round cake pans and grease them with a bit of butter or cooking spray, then lightly dust them with flour. This will ensure your cakes slide out effortlessly later. In a mixing bowl, whisk together the flour, granulated sugar, baking soda, and a pinch of salt. In another bowl, mix together the vegetable oil, buttermilk (make sure it’s at room temperature for easy blending), eggs, red food coloring, and vanilla extract. Trust me, the vibrant color is what makes it special!
Now, gently combine the wet and dry ingredients until just mixed. Be careful not to overmix – we want a tender cake, not a tough one! Finally, add in the vinegar, which will react with the baking soda to give your cake that lovely rise. Divide the batter evenly between the prepared pans and pop them in the oven for about 25 minutes, or until a toothpick inserted into the center comes out clean. Let the cakes cool in the pans for about 10 minutes before transferring them to wire racks to cool completely. This is where the magic happens!
Making the Frosting
Once your cakes have cooled, it’s time to whip up that luscious frosting! In a mixing bowl, beat the softened cream cheese and butter together until smooth and creamy. This step is crucial – you want that perfect texture! Gradually add in the powdered sugar and mix on low speed until combined. Finally, stir in the vanilla extract for an extra burst of flavor. Beat until everything is fluffy and well blended. You’ll be tempted to eat it straight off the whisk, so be careful!
Assembling the Cake
Now comes the fun part – assembling your cake! Place one cake layer on a serving plate or cake stand. Spread a generous amount of frosting on top, making sure to cover it evenly. Then, carefully place the second layer on top. Frost the top and the sides of the entire cake for that beautiful, finished look. If you want to add a festive touch, sprinkle some holiday-themed decorations on top. I love using red and green sprinkles for that extra cheer! Just remember, the more love you put into it, the more delicious it will be!
Why You’ll Love This Recipe
This *Red Velvet Christmas Cake* is not just a treat; it’s a celebration on a plate! Here are a few reasons why this recipe will quickly become a favorite in your holiday repertoire:
- Delicious Flavor: The perfect balance of cocoa and buttermilk creates a rich, moist cake that’s irresistibly tasty.
- Easy to Make: With straightforward steps, even novice bakers can whip up this stunning dessert in no time.
- Stunning Presentation: Its vibrant red color and creamy frosting make it a showstopper for any holiday table.
- Versatile for Celebrations: Perfect for Christmas, birthdays, or any special occasion when you want to impress your guests.
- Fun to Decorate: Let your creativity shine with sprinkles and festive decorations, making it a joyful baking experience!
Trust me, once you taste it, you’ll understand why this cake is a holiday must-have!
Tips for Success
To ensure your *Red Velvet Christmas Cake* turns out perfectly, here are some tried-and-true tips that I always keep in mind while baking:
- Room Temperature Ingredients: Make sure your buttermilk, eggs, and butter are at room temperature before mixing. This helps create a smoother batter and ensures everything blends together nicely.
- Don’t Overmix: When combining the wet and dry ingredients, mix until just combined. Overmixing can lead to a dense cake, and we want that tender, velvety texture!
- Check Your Oven Temperature: Ovens can vary, so it’s a good idea to use an oven thermometer to make sure it’s at the right temperature. If it’s too hot, your cake might bake too quickly on the outside while remaining raw inside.
- Cooling Time is Key: Let the cakes cool in the pans for about 10 minutes before transferring them to wire racks. This prevents them from breaking apart and allows them to finish cooling evenly.
- Frosting Consistency: If your frosting is too thick, add a splash of milk to reach the desired spreadable consistency. Conversely, if it’s too thin, add a bit more powdered sugar to thicken it up.
Follow these tips, and you’ll have a stunning cake that not only looks amazing but tastes incredible too!
Nutritional Information Disclaimer
Keep in mind that nutritional information can vary based on the specific ingredients you use and the brands you choose. While I’ve provided some general details about the *Red Velvet Christmas Cake*, these numbers are approximate and may not reflect your exact outcome. Always feel free to adjust depending on your ingredient selections or dietary requirements. Enjoy your baking journey and remember, the joy of sharing this cake is what truly counts!
FAQ Section
Got questions about making your *Red Velvet Christmas Cake*? Don’t worry, I’ve got you covered! Here are some of the most common queries I hear:
- Can I make this cake ahead of time? Absolutely! You can bake the cake layers a day in advance. Just wrap them tightly in plastic wrap and store them at room temperature. Frosting can also be made ahead; just keep it in the fridge until you’re ready to assemble!
- What can I substitute for buttermilk? If you don’t have buttermilk on hand, you can make a quick substitute by adding 1 tablespoon of vinegar or lemon juice to a cup of milk. Let it sit for about 5 minutes, and you’ll have a perfect buttermilk alternative.
- Can I use different food coloring? Yes! While traditional red food coloring gives that classic look, you can experiment with other colors for a unique twist. Just remember that the flavor won’t change much; it’s all about the festive vibes!
- How do I store leftover cake? To keep your cake fresh, store it in an airtight container at room temperature for up to three days. If you need to keep it longer, refrigerate it, but bring it back to room temperature before serving for the best flavor and texture.
- Can I freeze the cake? Definitely! Wrap the cooled cake layers tightly in plastic wrap and then in aluminum foil. They can be frozen for up to three months. Just thaw in the fridge overnight before frosting and serving.
These tips should help you navigate your baking adventure with ease. Enjoy every moment of creating this festive masterpiece!
Storage & Reheating Instructions
Storing your delicious *Red Velvet Christmas Cake* properly is key to keeping it fresh and tasty! If you have any leftovers (which I hope you do!), make sure to place the cake in an airtight container at room temperature for up to three days. This helps maintain its incredible moisture and flavor.
If you need to keep it longer, you can refrigerate it, but remember to bring it back to room temperature before serving. This will enhance the taste and texture! For those who want to plan ahead, you can also freeze the cake. Just wrap the cooled layers tightly in plastic wrap, then in aluminum foil, and pop them in the freezer for up to three months. When you’re ready to enjoy them, thaw the layers in the fridge overnight, then frost and serve. Trust me, it’ll taste just as good as the day you baked it!
Serving Suggestions
When it comes to serving your stunning *Red Velvet Christmas Cake*, there are a few delightful pairings that can enhance your holiday experience! I love serving slices of this cake alongside a steaming cup of spiced chai or rich hot cocoa. The warm spices in these drinks complement the cake’s flavors beautifully.
For an extra festive touch, consider adding a scoop of vanilla ice cream or a dollop of freshly whipped cream on the side. The creaminess balances the cake’s rich texture and adds a lovely contrast. If you’re feeling adventurous, a drizzle of chocolate or caramel sauce can elevate each slice, making it even more indulgent!
Don’t forget about garnishing! A sprinkle of crushed peppermint candies or festive holiday sprinkles on top of the frosting can add color and a fun crunch. Trust me, these little touches make all the difference and turn your dessert into a true holiday celebration!
For more festive ideas, check out our Pinterest page!

Red Velvet Christmas Cake
Equipment
- Oven
- Mixer
Ingredients
For the Cake
- 2 cups all-purpose flour
- 1 cup granulated sugar
- 1 cup vegetable oil
- 1 cup buttermilk room temperature
- 2 large eggs
- 2 tbsp red food coloring
- 1 tsp vanilla extract
- 1 tsp baking soda
- 1 tsp vinegar
For the Frosting
- 1 cup cream cheese softened
- 1/2 cup unsalted butter softened
- 4 cups powdered sugar
- 1 tsp vanilla extract
Instructions
- Preheat your oven to 350°F (175°C). Grease and flour two 9-inch round cake pans.
- In a mixing bowl, combine flour, sugar, baking soda, and salt.
- In another bowl, mix oil, buttermilk, eggs, food coloring, and vanilla.
- Combine the wet and dry ingredients. Add vinegar and mix well.
- Divide the batter between the prepared pans. Bake for 25 minutes or until a toothpick comes out clean.
- Let the cakes cool in the pans for 10 minutes before transferring to wire racks.
- For the frosting, beat cream cheese and butter until smooth. Gradually add powdered sugar and vanilla until well combined.
- Once the cakes are cooled, frost the top of one layer, place the second layer on top, and frost the top and sides.