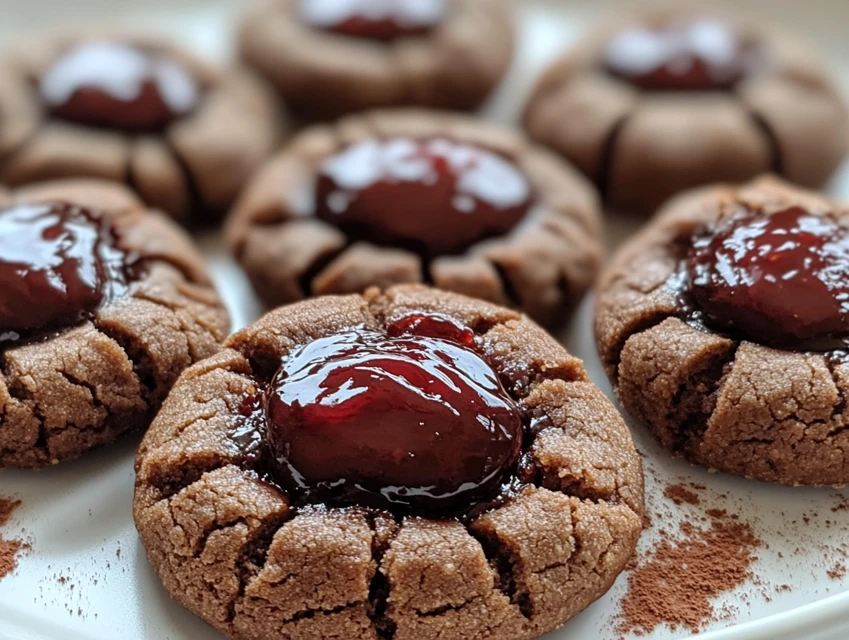
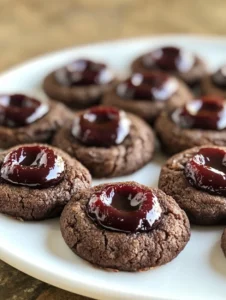
Introduction to Chocolate Cherry Thumbprint Cookies Recipe
The Origin of Thumbprint Cookies
Thumbprint cookies have a delightful history that dates back to Europe, particularly in Sweden and Poland. These cookies are known for their unique shape, which resembles a thumbprint. Traditionally, bakers would use their thumbs to create an indentation in the dough, perfect for holding sweet fillings. Over the years, variations have emerged, with different flavors and fillings, making thumbprint cookies a beloved treat worldwide. The combination of a soft, buttery cookie with a sweet center has captured the hearts of many, and today, we’re adding a delicious twist with chocolate and cherry!
Why You’ll Love This Chocolate Cherry Thumbprint Cookies Recipe
This Chocolate Cherry Thumbprint Cookies Recipe is a must-try for several reasons. First, the rich chocolate flavor pairs perfectly with the tartness of cherry preserves, creating a delightful balance. Each bite is a burst of flavor that will leave you wanting more. Second, these cookies are easy to make, even for beginners. With simple ingredients and straightforward steps, you can whip up a batch in no time. Lastly, they make for a stunning presentation at any gathering. Whether it’s a holiday party or a casual get-together, these cookies will impress your guests and satisfy their sweet cravings. So, let’s dive into this delicious recipe and bring some joy to your kitchen!
Ingredients for Chocolate Cherry Thumbprint Cookies Recipe
To create these delightful Chocolate Cherry Thumbprint Cookies, you’ll need a few simple ingredients. Each component plays a vital role in achieving that perfect balance of flavors and textures. Here’s what you’ll need:
- 1 cup unsalted butter, softened
- 1 cup granulated sugar
- 1 teaspoon vanilla extract
- 2 cups all-purpose flour
- 1/2 cup unsweetened cocoa powder
- 1/4 teaspoon salt
- 1/2 teaspoon baking powder
- 1 cup cherry preserves (or your favorite cherry filling)
- Optional: powdered sugar for dusting
These ingredients are easy to find at your local grocery store. The unsalted butter gives the cookies a rich flavor, while the granulated sugar adds sweetness. The combination of all-purpose flour and cocoa powder creates a soft, chocolatey base. Don’t forget the cherry preserves, as they are the star of this recipe! Feel free to get creative with your fillings if you want to try something different.
Now that you have your ingredients ready, let’s move on to the next step of preparing these scrumptious cookies!
Step-by-Step Preparation of Chocolate Cherry Thumbprint Cookies Recipe
Step 1: Preheat the Oven
Before you start mixing your ingredients, it’s important to preheat your oven. Set it to 350°F (175°C). Preheating ensures that your cookies bake evenly and achieve that perfect texture. While the oven warms up, you can gather your ingredients and get ready for the next steps. This little preparation makes a big difference in the final result!
Step 2: Prepare the Cookie Dough
Now, let’s make the cookie dough! In a large mixing bowl, cream together the softened unsalted butter and granulated sugar. Use an electric mixer or a whisk to blend them until the mixture is light and fluffy. This usually takes about 2-3 minutes. Next, add in the vanilla extract and mix well. In a separate bowl, combine the all-purpose flour, unsweetened cocoa powder, salt, and baking powder. Gradually add this dry mixture to the butter mixture, stirring until everything is well combined. Your dough should be soft and slightly sticky, perfect for shaping!
Step 3: Shape the Cookies
Once your dough is ready, it’s time to shape the cookies! Take a small amount of dough, about one tablespoon, and roll it into a ball. Place the ball on a baking sheet lined with parchment paper. Repeat this process, leaving some space between each cookie, as they will spread a little while baking. After all the balls are on the sheet, use your thumb (or the back of a spoon) to gently press down in the center of each ball, creating a small indentation. This is where the cherry filling will go!
Step 4: Bake the Cookies
Now, it’s time to bake! Place the baking sheet in your preheated oven and let the cookies bake for about 10-12 minutes. Keep an eye on them; you want them to be set but not overbaked. The edges should look firm, while the centers may still appear soft. Once they’re done, remove the cookies from the oven and let them cool on the baking sheet for a few minutes before transferring them to a wire rack. This cooling time helps them firm up a bit more.
Step 5: Add the Cherry Filling
After your cookies have cooled slightly, it’s time for the best part—the cherry filling! Using a small spoon or a piping bag, carefully fill each indentation with cherry preserves. Don’t be shy; a generous amount will make each cookie even more delicious! Once filled, let the cookies cool completely. This will allow the flavors to meld together beautifully, making each bite a delightful experience.
Variation of Chocolate Cherry Thumbprint Cookies Recipe
Alternative Fillings for Thumbprint Cookies
While cherry preserves are a classic choice, there are many other delicious fillings you can use for your thumbprint cookies. Here are some tasty alternatives to consider:
- Raspberry Jam: The tartness of raspberry jam pairs wonderfully with chocolate, creating a delightful flavor combination.
- Peanut Butter: For a nutty twist, fill the cookies with creamy or crunchy peanut butter. It adds a rich, savory element.
- Nutella: If you love hazelnut chocolate spread, using Nutella as a filling will make your cookies extra indulgent.
- Caramel Sauce: Drizzling caramel sauce into the center adds a sweet, gooey surprise that everyone will love.
- Fruit Preserves: Try other fruit preserves like apricot or strawberry for a different fruity flavor.
Feel free to mix and match these fillings based on your preferences. Each option brings a unique taste to the cookies, making them versatile for any occasion!
Gluten-Free Options for Chocolate Cherry Thumbprint Cookies Recipe
If you or your guests are gluten-sensitive, you can still enjoy these delightful cookies! Here’s how to make a gluten-free version:
- Gluten-Free Flour Blend: Substitute all-purpose flour with a gluten-free flour blend. Make sure it’s a 1:1 ratio for best results.
- Almond Flour: For a nutty flavor, you can use almond flour. Just remember to adjust the amount, as it may require less than regular flour.
- Oats: Ground oats can also work well. Just ensure they are certified gluten-free to avoid cross-contamination.
These gluten-free options will allow everyone to enjoy the rich flavors of chocolate and cherry without worry. Just follow the same steps in the recipe, and you’ll have a batch of cookies that everyone can savor!
Cooking Note for Chocolate Cherry Thumbprint Cookies Recipe
When it comes to baking, a few simple tips can make a big difference in the outcome of your Chocolate Cherry Thumbprint Cookies. Here are some essential cooking notes to keep in mind:
- Room Temperature Ingredients: Ensure your butter is softened to room temperature. This helps it blend smoothly with the sugar, creating a light and fluffy texture. Cold butter can lead to dense cookies.
- Measuring Flour: When measuring flour, use the spoon-and-level method. Spoon the flour into your measuring cup and level it off with a knife. This prevents packing, which can result in dry cookies.
- Chill the Dough: If your dough feels too sticky, consider chilling it for about 30 minutes. This makes it easier to handle and shape, leading to perfectly formed cookies.
- Watch the Baking Time: Every oven is different. Keep an eye on your cookies as they bake. They should be set around the edges but still soft in the center. Overbaking can lead to dry cookies.
- Cooling Time: Allow the cookies to cool on the baking sheet for a few minutes before transferring them to a wire rack. This helps them firm up and prevents breakage.
By following these cooking notes, you’ll ensure that your Chocolate Cherry Thumbprint Cookies turn out perfectly every time. Happy baking!
Serving Suggestions for Chocolate Cherry Thumbprint Cookies Recipe
Pairing with Beverages
When it comes to enjoying your Chocolate Cherry Thumbprint Cookies, the right beverage can elevate the experience. Here are some delightful pairings to consider:
- Coffee: A warm cup of coffee complements the rich chocolate flavor beautifully. The bitterness of coffee balances the sweetness of the cookies.
- Tea: Herbal teas, like chamomile or peppermint, offer a soothing contrast. For a stronger flavor, try a black tea, which pairs well with chocolate.
- Milk: A classic choice! The creaminess of milk enhances the cookie’s flavors and is especially loved by kids.
- Hot Chocolate: For chocolate lovers, pairing these cookies with a cup of hot chocolate creates a double chocolate delight!
- Red Wine: If you’re serving these cookies at a gathering, a glass of fruity red wine can be a sophisticated pairing that enhances the cherry flavor.
Experiment with these beverages to find your favorite combination. Each sip will bring out the deliciousness of your cookies!
Presentation Ideas for Serving
Presentation is key when serving your Chocolate Cherry Thumbprint Cookies. Here are some creative ideas to make your cookies look as good as they taste:
- Cookie Platter: Arrange the cookies on a decorative platter. You can add some fresh cherries or chocolate shavings around them for a pop of color.
- Gift Boxes: Package the cookies in cute gift boxes or tins. This makes for a lovely homemade gift for friends and family.
- Dusting with Powdered Sugar: A light dusting of powdered sugar adds a touch of elegance. It also gives a snowy appearance that’s perfect for festive occasions.
- Serving with Ice Cream: Serve the cookies warm with a scoop of vanilla ice cream on the side. The combination of warm cookies and cold ice cream is simply irresistible!
- Decorative Napkins: Use colorful or themed napkins to enhance the visual appeal. This small touch can make your serving table look inviting.
With these serving suggestions, your Chocolate Cherry Thumbprint Cookies will not only taste amazing but also look stunning on any table. Enjoy sharing them with loved ones!
Tips for Perfect Chocolate Cherry Thumbprint Cookies Recipe
Common Mistakes to Avoid
When baking Chocolate Cherry Thumbprint Cookies, a few common mistakes can lead to less-than-perfect results. Here are some pitfalls to watch out for:
- Using Cold Butter: Cold butter can make it hard to achieve a fluffy texture. Always use softened butter for the best results.
- Overmixing the Dough: Mixing too much can lead to tough cookies. Mix just until the ingredients are combined for a tender bite.
- Not Preheating the Oven: Skipping this step can cause uneven baking. Always preheat your oven to ensure consistent results.
- Skipping the Cooling Time: Allowing cookies to cool on the baking sheet is crucial. This helps them firm up and prevents breakage.
- Filling Too Much or Too Little: Finding the right amount of cherry filling is key. Too much can overflow, while too little can leave the cookies dry.
By avoiding these common mistakes, you’ll be on your way to baking perfect Chocolate Cherry Thumbprint Cookies every time!
Storage Tips for Leftover Cookies
After baking a batch of these delicious cookies, you might have some leftovers. Here’s how to store them properly:
- Room Temperature: Store cookies in an airtight container at room temperature. They will stay fresh for up to a week.
- Refrigeration: If you want to keep them longer, you can refrigerate them. Just make sure they are in a sealed container to prevent them from drying out.
- Freezing: For longer storage, freeze the cookies. Place them in a single layer on a baking sheet until frozen, then transfer to a freezer-safe bag. They can last up to three months in the freezer.
- Thawing: When ready to enjoy, simply thaw at room temperature or warm them in the microwave for a few seconds.
With these storage tips, you can enjoy your Chocolate Cherry Thumbprint Cookies for days to come!
Tips for Perfect Chocolate Cherry Thumbprint Cookies Recipe
Common Mistakes to Avoid
Baking can be a fun adventure, but it’s easy to make mistakes along the way. Here are some common pitfalls to avoid when making your Chocolate Cherry Thumbprint Cookies:
- Using Cold Butter: Cold butter can make it hard to achieve a fluffy texture. Always use softened butter for the best results. This helps the sugar blend in smoothly.
- Overmixing the Dough: Mixing too much can lead to tough cookies. Mix just until the ingredients are combined for a tender bite. Remember, less is more!
- Not Preheating the Oven: Skipping this step can cause uneven baking. Always preheat your oven to ensure consistent results. This is crucial for the perfect cookie texture.
- Skipping the Cooling Time: Allowing cookies to cool on the baking sheet is crucial. This helps them firm up and prevents breakage. Patience pays off!
- Filling Too Much or Too Little: Finding the right amount of cherry filling is key. Too much can overflow, while too little can leave the cookies dry. Aim for a generous but controlled amount.
By avoiding these common mistakes, you’ll be on your way to baking perfect Chocolate Cherry Thumbprint Cookies every time!
Storage Tips for Leftover Cookies
After baking a batch of these delicious cookies, you might have some leftovers. Here’s how to store them properly to keep them fresh and tasty:
- Room Temperature: Store cookies in an airtight container at room temperature. They will stay fresh for up to a week. This is the easiest way to keep them soft!
- Refrigeration: If you want to keep them longer, you can refrigerate them. Just make sure they are in a sealed container to prevent them from drying out. This can help maintain their flavor.
- Freezing: For longer storage, freeze the cookies. Place them in a single layer on a baking sheet until frozen, then transfer to a freezer-safe bag. They can last up to three months in the freezer. This is a great option for future cravings!
- Thawing: When ready to enjoy, simply thaw at room temperature or warm them in the microwave for a few seconds. This will bring back their delightful texture.
With these storage tips, you can enjoy your Chocolate Cherry Thumbprint Cookies for days to come! Happy baking!
Breakdown of Time for Chocolate Cherry Thumbprint Cookies Recipe
Prep Time
Preparing your Chocolate Cherry Thumbprint Cookies is a breeze! The prep time for this delightful recipe is approximately 20 minutes. This includes gathering your ingredients, mixing the dough, and shaping the cookies. It’s a quick process that allows you to enjoy the fun of baking without spending hours in the kitchen. So, roll up your sleeves and get ready to create some delicious treats!
Cooking Time
The cooking time for these cookies is about 10 to 12 minutes. During this time, your cookies will bake to perfection, achieving that soft center and slightly crisp edges. Keep an eye on them as they bake, ensuring they don’t overcook. The aroma of chocolate and cherries will fill your kitchen, making it hard to wait for them to cool!
Total Time
In total, you can expect to spend around 30 to 35 minutes from start to finish. This includes both prep and cooking time. With such a quick turnaround, you can whip up a batch of Chocolate Cherry Thumbprint Cookies in no time. Perfect for unexpected guests or a sweet treat for yourself!
Nutritional Information for Chocolate Cherry Thumbprint Cookies Recipe
Calories
When indulging in Chocolate Cherry Thumbprint Cookies, it’s good to know the calorie content. Each cookie contains approximately 120 calories. This makes them a delightful treat without going overboard. Enjoying one or two cookies can satisfy your sweet tooth while keeping your calorie intake in check. Remember, moderation is key!
Protein
These cookies also provide a small amount of protein, with each cookie containing about 2 grams. While they are not a significant source of protein, every little bit helps! Pairing these cookies with a glass of milk can boost your protein intake, making for a more balanced snack. It’s a tasty way to enjoy a treat while still being mindful of your nutrition.
Sodium
In terms of sodium, each Chocolate Cherry Thumbprint Cookie has around 50 milligrams. This is relatively low, making them a suitable option for those watching their sodium intake. As always, it’s important to consider your overall diet. Enjoy these cookies as part of a balanced meal plan, and you’ll be able to savor their deliciousness without worry!
FAQs about Chocolate Cherry Thumbprint Cookies Recipe
Can I use fresh cherries instead of cherry preserves?
Using fresh cherries in your Chocolate Cherry Thumbprint Cookies is possible, but it requires a bit of extra work. Fresh cherries are juicy and can be tart, so you’ll need to cook them down first. Simply pit and chop the cherries, then simmer them in a saucepan with a little sugar until they become soft and syrupy. This will create a filling that mimics the sweetness of cherry preserves. Just remember to let the mixture cool before adding it to your cookies!
How do I store Chocolate Cherry Thumbprint Cookies?
Storing your Chocolate Cherry Thumbprint Cookies is easy! Keep them in an airtight container at room temperature for up to a week. This will help maintain their softness and flavor. If you want to keep them longer, you can refrigerate them in a sealed container. For even longer storage, consider freezing the cookies. Just place them in a single layer on a baking sheet until frozen, then transfer them to a freezer-safe bag. They can last up to three months in the freezer!
Can I freeze Chocolate Cherry Thumbprint Cookies?
Absolutely! Freezing Chocolate Cherry Thumbprint Cookies is a great way to enjoy them later. After baking and cooling, place the cookies in a single layer on a baking sheet and freeze until solid. Then, transfer them to a freezer-safe bag or container. When you’re ready to enjoy them, simply thaw at room temperature or warm them in the microwave for a few seconds. This way, you can have a delicious treat ready whenever you crave something sweet!
What can I substitute for butter in this recipe?
If you need a substitute for butter in your Chocolate Cherry Thumbprint Cookies, there are several options. You can use margarine or a plant-based butter alternative for a similar texture and flavor. For a healthier option, try using coconut oil. Just make sure it’s melted and cooled before mixing it into your dough. Applesauce is another alternative, but it may change the texture slightly, making the cookies softer. Experiment with these substitutes to find what works best for you!
Conclusion on Chocolate Cherry Thumbprint Cookies Recipe
In conclusion, Chocolate Cherry Thumbprint Cookies are a delightful treat that combines rich chocolate with the sweet and tart flavor of cherry preserves. This recipe is not only easy to follow but also allows for creativity with various fillings and gluten-free options. Whether you’re baking for a special occasion or just to satisfy a sweet craving, these cookies are sure to impress.
As you embark on your baking journey, remember the tips and tricks shared throughout this article. From proper ingredient preparation to thoughtful storage methods, each step contributes to the success of your cookies. The joy of baking is not just in the final product but also in the process itself. So, gather your ingredients, invite a friend or family member to join you, and enjoy the experience of creating something delicious together.
Once your Chocolate Cherry Thumbprint Cookies are ready, don’t forget to share them with loved ones. Their beautiful presentation and delightful taste will surely bring smiles to everyone’s faces. Happy baking, and may your kitchen be filled with the sweet aroma of chocolate and cherries!
Chocolate Cherry Thumbprint Cookies
Equipment
- Mixing bowl
- Baking sheet
- Parchment paper
- Electric mixer or whisk
- Wire rack
- Spoon or piping bag
Ingredients
- 1 cup Unsalted butter Softened to room temperature.
- 1 cup Granulated sugar Adds sweetness to the cookies.
- 1 teaspoon Vanilla extract Enhances the flavor of the cookies.
- 2 cups All-purpose flour Forms the base of the cookie dough.
- 1/2 cup Unsweetened cocoa powder Gives the cookies a rich chocolate flavor.
- 1/4 teaspoon Salt Balances the sweetness.
- 1/2 teaspoon Baking powder Helps the cookies rise.
- 1 cup Cherry preserves Filling for the cookies.
- Optional Powdered sugar For dusting on top before serving.
Instructions
- Preheat your oven to 350°F (175°C).
- In a large mixing bowl, cream together the softened butter and granulated sugar until light and fluffy, about 2-3 minutes.
- Add the vanilla extract and mix well.
- In a separate bowl, combine the flour, cocoa powder, salt, and baking powder.
- Gradually add the dry mixture to the butter mixture, stirring until well combined. The dough should be soft and slightly sticky.
- Take about one tablespoon of dough and roll it into a ball. Place it on a baking sheet lined with parchment paper.
- Use your thumb or the back of a spoon to create an indentation in the center of each ball.
- Bake in the preheated oven for 10-12 minutes. The edges should be firm, and the centers may still appear soft.
- Remove from the oven and let cool on the baking sheet for a few minutes before transferring to a wire rack.
- Once cooled, fill each indentation with cherry preserves. Optionally, dust with powdered sugar before serving.