Oh, let me tell you about my love affair with baked chicken liver! If you’re looking for a delicious way to pack in some protein, you’ve hit the jackpot. Each serving of this dish boasts a whopping 28 grams of protein, which makes it a fantastic option for dinner, especially after a long day. I first tried this recipe at a friend’s dinner party, and I was blown away by how tender and flavorful the livers were. The best part? It’s so easy to make!
Whenever I whip up this dish, it’s not just about the protein; it’s about the memories. I remember standing in my grandmother’s kitchen, watching her prepare liver as a comforting staple. She always said it was a powerhouse of nutrition, and I couldn’t agree more! The rich, savory flavor paired with a drizzle of olive oil and simple seasonings makes it a dish I keep coming back to. Whether you serve it as an appetizer or a main course, baked chicken liver is sure to win hearts and fill bellies!
Ingredients List
Gathering the right ingredients is key to making the perfect baked chicken liver. Here’s what you’ll need:
- 500g Chicken Liver – Make sure they’re cleaned and ready to cook. Fresh is best for that tender texture!
- 1 tsp Salt – This simple seasoning elevates the flavors beautifully.
- 1/2 tsp Black Pepper – A little kick to complement the richness of the liver.
- 2 tbsp Olive Oil – Drizzle this over the livers for added moisture and flavor.
With these straightforward ingredients, you’re well on your way to a delightful meal that’s packed with nutrition and taste!
How to Prepare Baked Chicken Liver
Getting your baked chicken liver just right is a breeze when you follow these simple steps. It’s all about timing and attention to detail, so let’s dive right in!
Step 1: Preheat the Oven
First things first, you’ll want to preheat your oven to 375°F (190°C). This step is super important because it ensures that the chicken livers cook evenly and develop that lovely golden color we all crave. So, go ahead and set that temperature while you prep the livers. It’s one of those little details that really makes a difference!
Step 2: Prepare the Chicken Livers
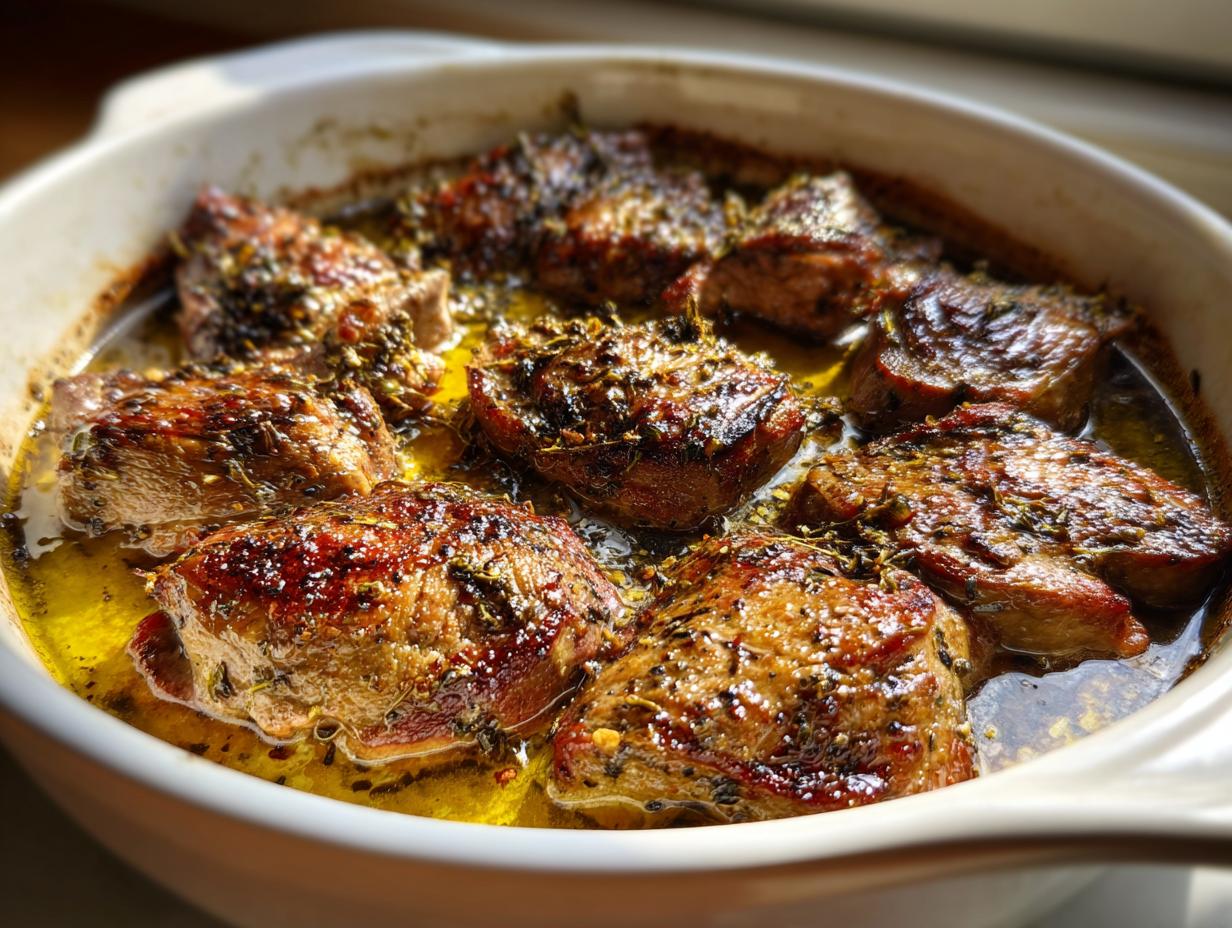
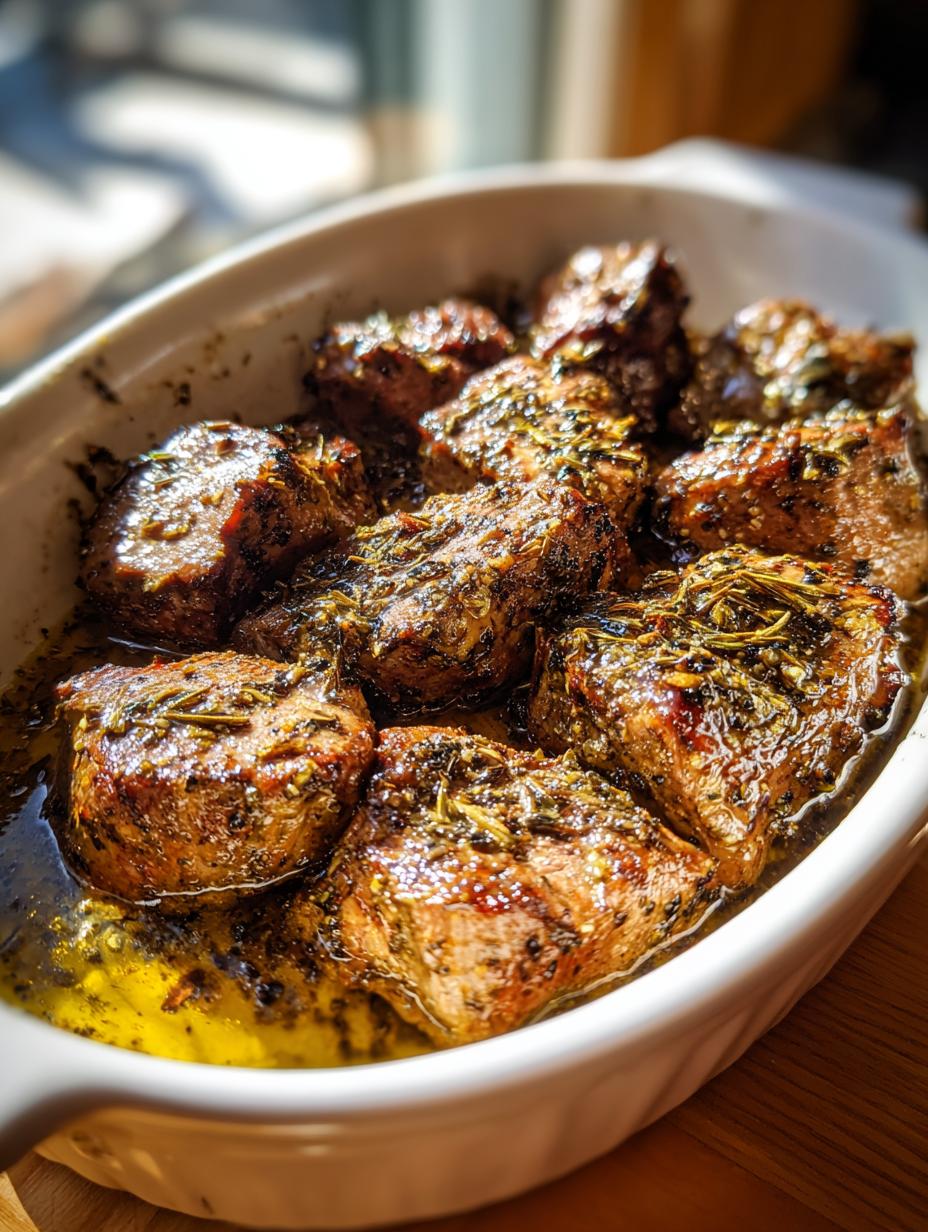
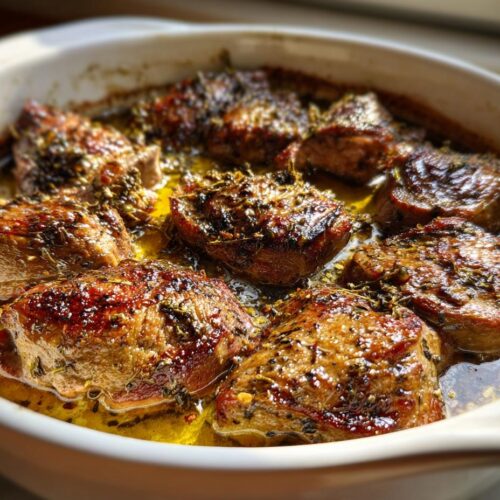
Now, onto the chicken livers! Start by giving them a good rinse under cold water. You’ll want to remove any visible membranes or connective tissue. Once they’re cleaned, place them in your baking dish, spreading them out in a single layer. This allows them to bake evenly and get that delicious texture we’re looking for!
Step 3: Season the Chicken Livers
Next, it’s time to season! Sprinkle the cleaned livers with salt and black pepper. Trust me, these spices are not just for show; they enhance the natural flavor of the liver beautifully. Then, drizzle the olive oil over the top. This adds moisture and helps the livers achieve a lovely, caramelized finish. Give everything a gentle toss to coat them evenly.
Step 4: Baking Time
Slide your baking dish into the preheated oven and let them bake for about 25 minutes. The key here is to keep an eye on them! You want the livers to be cooked through but still tender. They’re done when they’re no longer pink in the center. If you’re unsure, a quick poke with a fork should help – if the juices run clear, you’re good to go!
Nutritional Information
Let’s talk about the goodness packed into baked chicken liver! This dish is not only delicious, but it’s also a powerhouse of nutrition. Each serving contains approximately 280 calories, making it a satisfying option without weighing you down. With 28 grams of protein, it’s perfect for those looking to boost their protein intake, whether you’re an athlete or just someone who loves a hearty meal.
In addition to the protein, you’ll find 20 grams of fat, which contributes to that rich flavor we adore. The 2 grams of carbohydrates make it a low-carb choice as well. Plus, with significant amounts of vitamin A and iron, it’s a great way to support your health while enjoying a timeless dish. Keep in mind that these values are estimates, but they highlight just how nourishing baked chicken liver can be!
Why You’ll Love This Recipe
Baked chicken liver is not just a meal; it’s a delicious experience packed with benefits! Here’s why you’re going to adore this recipe:
- High Protein Content: With a whopping 28 grams of protein per serving, it’s perfect for muscle recovery and keeping you full.
- Quick and Easy: With just 15 minutes of prep and 25 minutes of cooking, you can have a wholesome dinner on the table in under an hour!
- Versatile Dish: Whether you enjoy it as an appetizer or main course, baked chicken liver fits perfectly into any meal plan.
- Rich Flavor: The combination of simple seasonings allows the natural taste of the liver to shine, making it a delightful treat for your taste buds.
Once you try this recipe, you’ll wonder why you didn’t make it sooner!
Storage & Reheating Instructions
Storing your baked chicken liver properly ensures that you can enjoy those delicious leftovers without losing any flavor! Once your livers have cooled to room temperature, transfer them to an airtight container. They’ll keep well in the refrigerator for up to three days. If you want to enjoy them later, consider freezing them! Just make sure to wrap them tightly in plastic wrap before placing them in a freezer-safe bag. They should be good for about three months in the freezer.
When it comes to reheating, I recommend using the oven for the best results. Preheat your oven to 350°F (175°C) and place the chicken livers on a baking sheet. Cover them with aluminum foil to keep them moist and heat for about 10-15 minutes, or until warmed through. You can also use a microwave, but be careful not to overheat them, as they can become tough. A quick 30-second burst, then check and repeat if needed, should do the trick!
Tips for Success
To ensure your baked chicken liver turns out perfectly every time, here are some pro tips that I swear by:
- Choose Fresh Livers: Always opt for fresh chicken livers if possible. They’ll have a better texture and flavor compared to frozen ones.
- Don’t Overcook: It’s easy to overcook chicken liver, leading to a tough texture. Keep an eye on them while baking, and remember, they should be just cooked through but still slightly pink in the center.
- Let Them Rest: After baking, let the livers rest for a few minutes before serving. This helps the juices redistribute and keeps them moist.
- Experiment with Seasonings: Feel free to add herbs like thyme or rosemary for an extra flavor boost. Just don’t overpower the natural taste of the liver!
- Use a Meat Thermometer: If you’re unsure, a meat thermometer can help! Aim for about 160°F (70°C) for perfectly cooked livers.
With these tips, you’ll master baked chicken liver in no time and impress everyone at the dinner table!
Frequently Asked Questions
Got questions about baked chicken liver? I’ve got you covered! Here are some common queries I hear about this delightful dish:
Q1: Is baked chicken liver healthy?
Absolutely! Baked chicken liver is not only packed with 28 grams of protein per serving, but it’s also rich in essential nutrients like iron and vitamin A. It’s a great choice for anyone looking to boost their nutrition!
Q2: Can I use frozen chicken liver?
You can, but I recommend using fresh chicken liver for the best texture and flavor. If you do use frozen, make sure to thaw them completely and pat them dry before cooking to avoid excess moisture.
Q3: What can I serve with baked chicken liver?
Baked chicken liver pairs wonderfully with a variety of sides. You can serve it alongside a fresh salad, roasted vegetables, or even on a slice of toasted bread as a tasty appetizer!
Q4: How do I know when the chicken liver is done?
The chicken liver is perfectly cooked when it’s no longer pink in the center. A good rule of thumb is to check that the juices run clear, and a meat thermometer should read about 160°F (70°C).
Q5: Can I add other seasonings to the recipe?
Definitely! Feel free to experiment with herbs and spices. A sprinkle of thyme or garlic powder can elevate the flavor without overshadowing the deliciousness of the liver!
For more delicious recipes, check out our Pinterest page!
Baked Chicken Liver
Equipment
- Oven
- Baking dish
Ingredients
For the Chicken Liver
- 500 g Chicken Liver
For the Seasoning
- 1 tsp Salt
- 1/2 tsp Black Pepper
- 2 tbsp Olive Oil For drizzling
Instructions
- Preheat your oven to 375°F (190°C).
- Clean the chicken livers and place them in a baking dish.
- Season with salt, black pepper, and drizzle with olive oil.
- Bake for 25 minutes until cooked through.