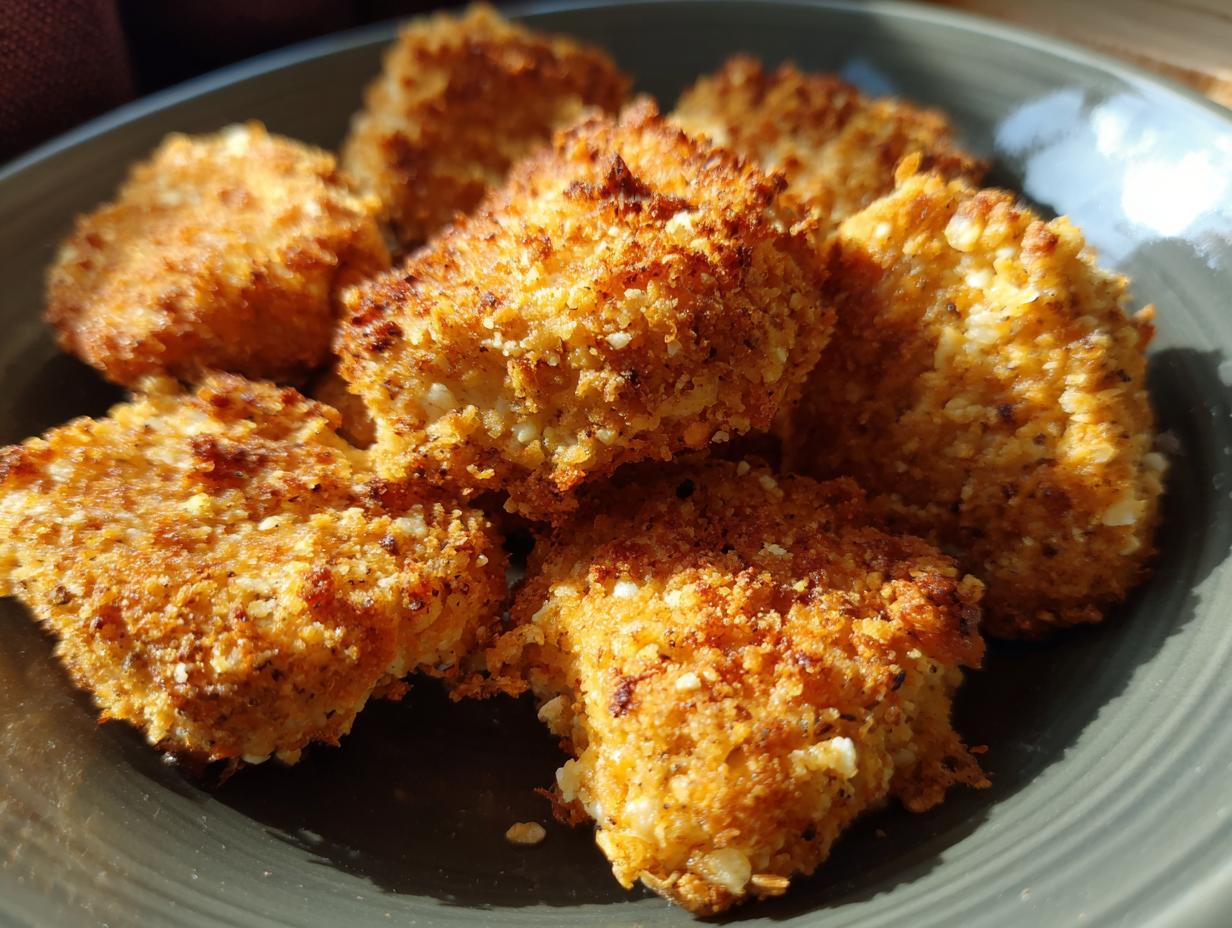
If you’re looking for a healthy snack that’s both delicious and easy to make, let me introduce you to my Air Fryer Chickpea Nuggets! Chickpeas are little powerhouses of nutrition, packed with protein and fiber, making them a fantastic choice for any time of day. Plus, these nuggets are a total breeze to whip up—prep takes just 15 minutes, and they’re ready to enjoy in about 20 minutes in the air fryer!
Whenever I’m craving something crunchy and satisfying, these nuggets come to the rescue. I love dipping them in my favorite sauce or just enjoying them plain. They’re perfect for movie nights or as an after-school snack for the kids. Trust me, once you try these, you’ll be making them on repeat!
Ingredients List
To make these delicious Air Fryer Chickpea Nuggets, you’ll need a few simple ingredients that pack a flavor punch!
- 1 can of chickpeas (drained and rinsed) – these are the star of the show! Make sure to rinse them well to remove any excess salt or preservatives.
- 1/2 cup of bread crumbs – this adds the crunch! You can use regular or panko breadcrumbs for extra crispiness.
- 1 tsp of garlic powder – for that wonderful savory flavor that pairs perfectly with chickpeas.
- 1 tsp of onion powder – this brings a nice depth of flavor to your nuggets.
- 1/2 tsp of salt – just enough to enhance all the flavors.
- 1/4 cup of flour – this will help create the coating for your nuggets.
- 1 tbsp of water – to mix with the flour and create a batter.
Gather these ingredients, and you’ll be well on your way to making a tasty, healthy snack in no time!
How to Prepare Air Fryer Chickpea Nuggets
Getting your Air Fryer Chickpea Nuggets just right is super easy! Follow these steps, and you’ll have a crunchy, delicious snack in no time. Let’s dive in!
Step 1: Preheat the Air Fryer
First things first, you’ll want to preheat your air fryer to 400°F (200°C). This step is crucial because it ensures that your nuggets cook evenly and get that lovely crispiness we all crave. Preheating also helps them cook faster, so don’t skip this part!
Step 2: Prepare the Chickpea Mixture
In a mixing bowl, mash the drained and rinsed chickpeas using a fork or a potato masher. You want them to be mostly smooth but leave a few chunks for texture. Once mashed, stir in the bread crumbs, garlic powder, onion powder, and salt. Make sure everything is well combined. The mixture should be thick and slightly sticky, making it easy to form into nuggets!
Step 3: Shape the Nuggets
Now comes the fun part! Grab a handful of the chickpea mixture and form it into nugget shapes. I like to make them about the size of a golf ball and then flatten them slightly. This helps them cook more evenly. Feel free to make them whatever shape you like—just keep them uniform for even cooking!
Step 4: Create the Coating
In a separate bowl, mix together the flour and water until you get a smooth batter. It should be thick enough to coat the nuggets but not too runny. If it feels too thick, add a tiny splash of water. You want a nice consistency that sticks to the nuggets without dripping off.
Step 5: Cook the Nuggets
Place your shaped nuggets in the air fryer basket in a single layer. Cook them for about 20 minutes, shaking the basket halfway through to ensure they get crispy on all sides. You’ll know they’re done when they’re golden brown and smell absolutely amazing!
Why You’ll Love This Recipe
- Quick Preparation: With just 15 minutes of prep time, you can have a delicious snack ready in under an hour!
- Healthy Ingredients: Made with chickpeas, these nuggets are packed with nutrients and free from unhealthy additives.
- Protein-Packed: Each serving delivers a good amount of protein, making them a perfect snack for fueling your day.
- Delicious Flavor: The combination of garlic and onion powder gives these nuggets a savory taste that’s hard to resist.
- Customizable: Feel free to add your favorite spices or herbs to make them your own!
FAQ Section
Q1: Can I make these Air Fryer Chickpea Nuggets gluten-free?
Absolutely! Just swap the regular breadcrumbs for gluten-free breadcrumbs, and use a gluten-free flour for the coating. They’ll still be delicious!
Q2: How do I store leftover nuggets?
Store any leftover nuggets in an airtight container in the fridge for up to 3 days. When you’re ready to enjoy them again, just pop them back in the air fryer for a few minutes to reheat.
Q3: Can I freeze these nuggets?
Yes, you can! After shaping the nuggets, freeze them on a baking sheet until solid, then transfer them to a freezer bag. When you’re ready to eat, cook them straight from frozen, adding a few extra minutes to the cooking time.
Q4: What dipping sauce pairs well with these nuggets?
I love pairing them with a tangy dipping sauce like tzatziki or a spicy sriracha mayo. But feel free to get creative with your favorite sauces!
Q5: Can I add other ingredients to the chickpea mixture?
Definitely! Feel free to toss in some chopped herbs, grated cheese, or even finely diced veggies for extra flavor and nutrition.
Nutritional Information Section
These Air Fryer Chickpea Nuggets not only taste great but are also packed with good-for-you nutrients! Here’s a breakdown of the estimated nutritional values per serving:
- Calories: 150
- Fat: 5g
- Protein: 6g
- Carbohydrates: 22g
- Saturated Fat: 1g
- Sodium: 250mg
- Fiber: 5g
- Sugar: 1g
Keep in mind that these values can vary based on specific ingredients and portion sizes, but overall, you’re getting a wholesome snack that’s both nutritious and satisfying!
Tips for Success
To make sure your Air Fryer Chickpea Nuggets turn out perfectly every time, here are some helpful tips! First, if you’d like a bit more flavor, don’t hesitate to add your favorite spices like smoked paprika or cumin to the chickpea mixture. When it comes to serving, these nuggets are fantastic with a dipping sauce, but they also shine in salads or wraps!
For storage, keep any leftovers in an airtight container in the fridge for up to three days. And if you want to prep ahead, feel free to shape the nuggets and freeze them. Just cook them straight from the freezer, adding a few extra minutes to the time. Enjoy your crunchy goodness!
Final Thoughts
I hope you enjoy making and munching on these Air Fryer Chickpea Nuggets as much as I do! They’re a fantastic snack that brings flavor and nutrition together. I’d love to hear your thoughts—feel free to share your experiences or ask any questions in the comments below. Happy cooking!
For more delicious recipes, check out my Pinterest page!
Air Fryer Chickpea Nuggets
Equipment
- Air Fryer
- Mixing bowl
Ingredients
For the Nuggets
- 1 can chickpeas drained and rinsed
- 1/2 cup bread crumbs
- 1 tsp garlic powder
- 1 tsp onion powder
- 1/2 tsp salt
For the Coating
- 1/4 cup flour
- 1 tbsp water
Instructions
- Preheat your air fryer to 400°F (200°C).
- In a mixing bowl, mash the chickpeas and mix in the bread crumbs, garlic powder, onion powder, and salt.
- Form the mixture into nugget shapes.
- In a separate bowl, mix flour and water to create a batter. Dip each nugget into the batter.
- Place the nuggets in the air fryer basket and cook for 20 minutes, shaking halfway through.