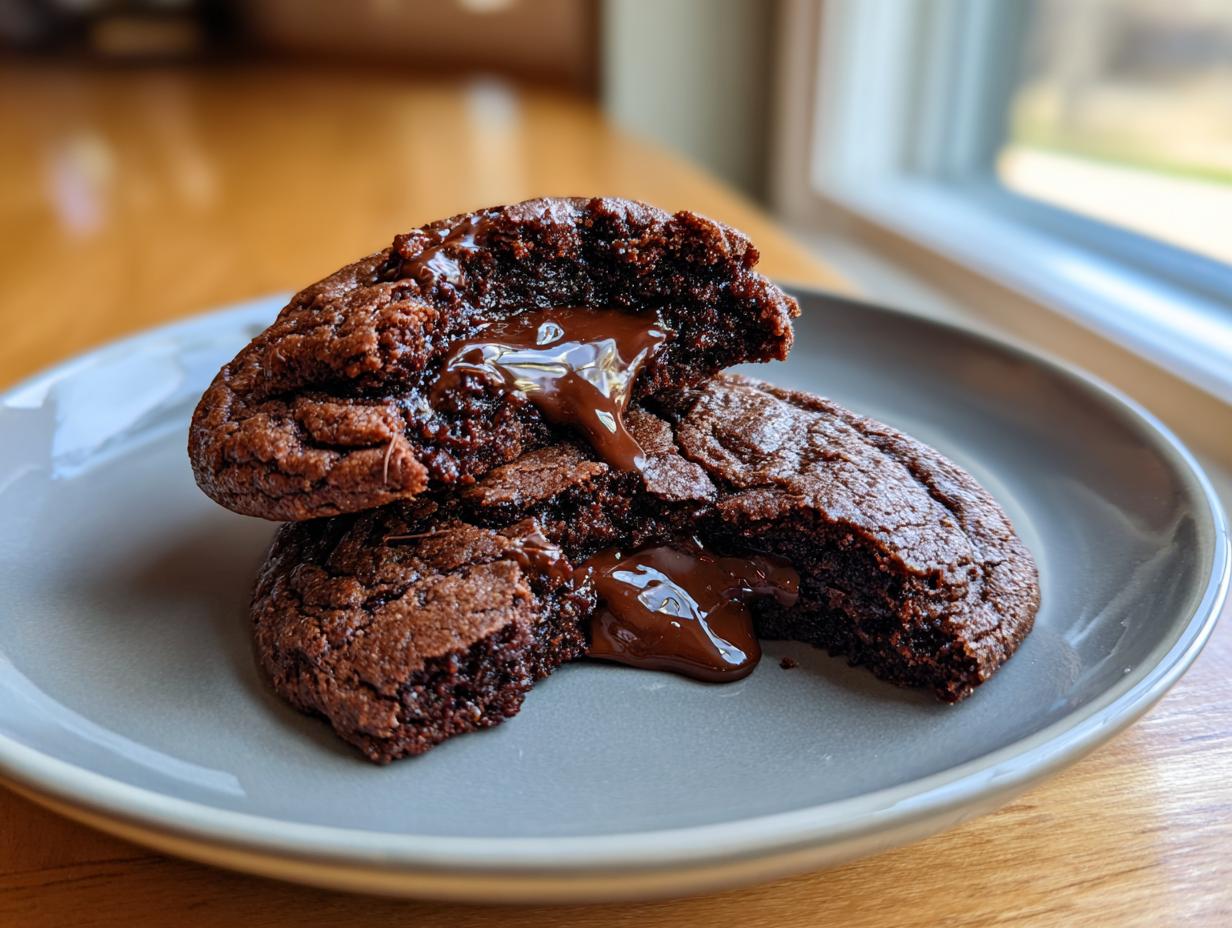
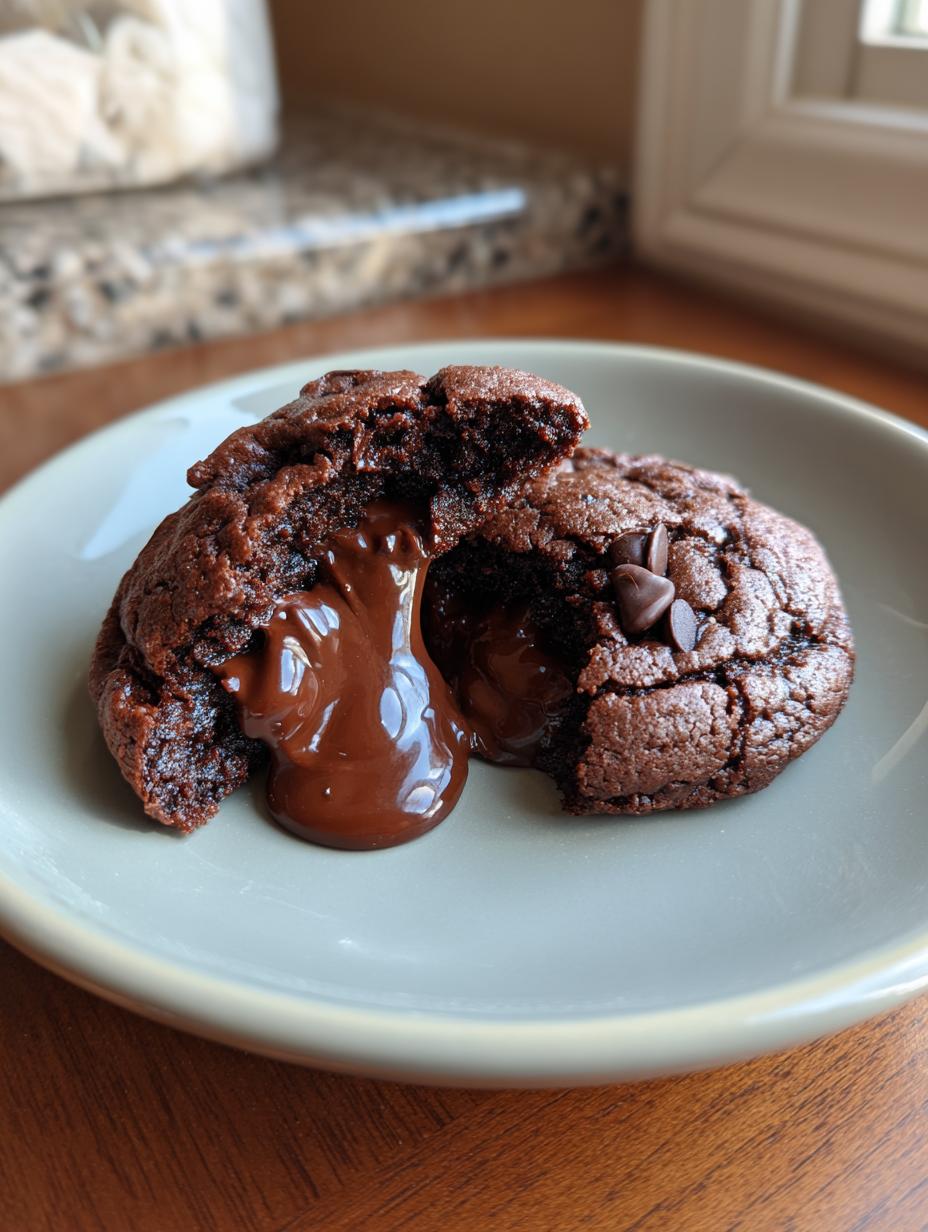
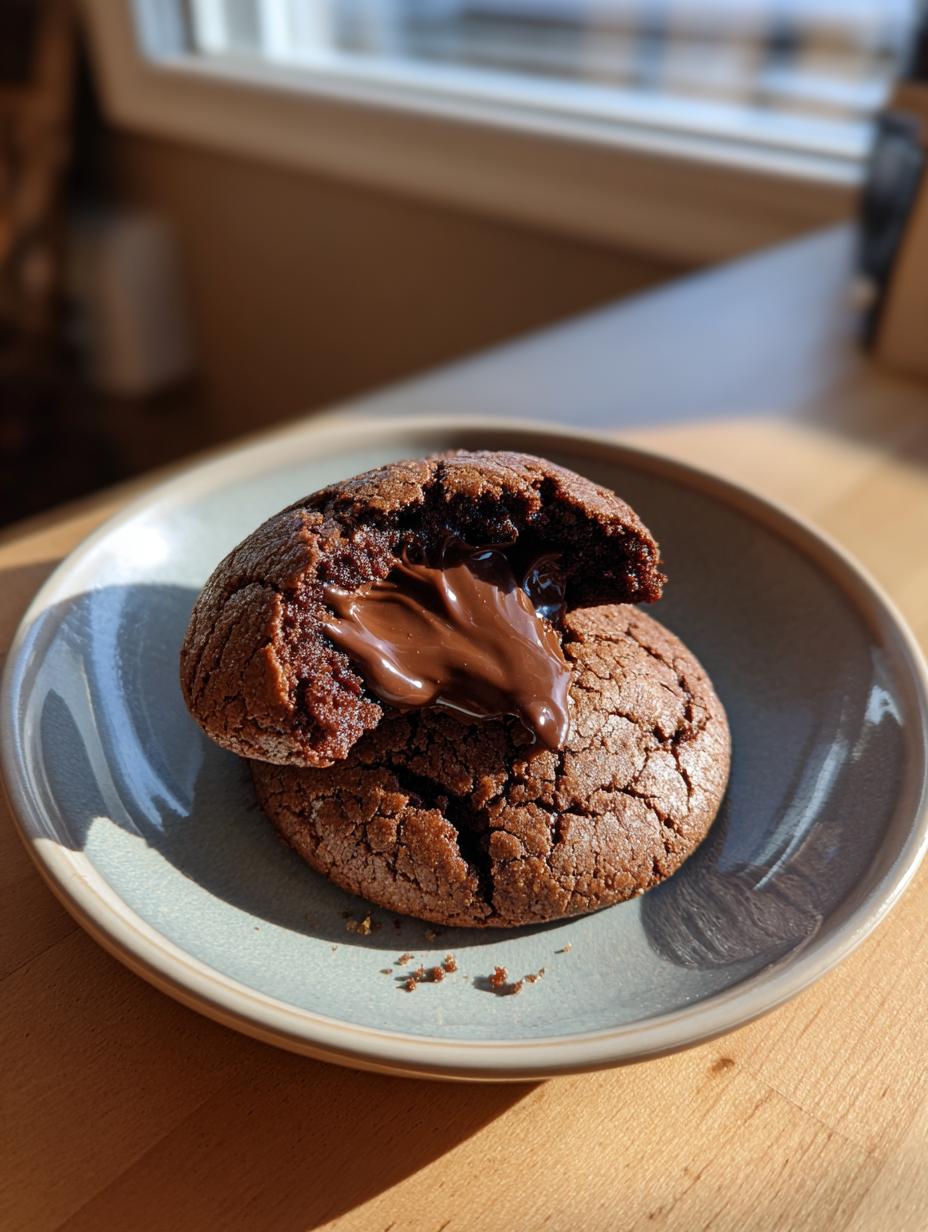
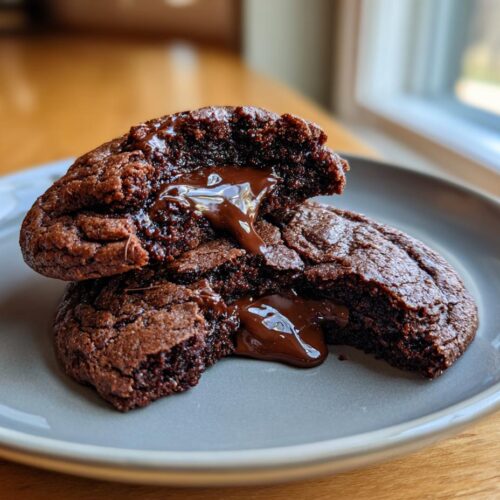
Oh my goodness, friends, do I have a treat for you today! Get ready to have your minds, and your taste buds, absolutely blown. We’re diving headfirst into the glorious, gooey world of Chocolate Lava Cookies! Seriously, these aren’t just cookies; they’re an experience. Imagine biting into a rich, fudgy chocolate cookie, and then BAM – a warm, molten chocolate center just oozes out. It’s pure magic, I tell ya!
I’ve been on a mission, a delicious, chocolate-filled quest, to perfect these beauties. I’ve tried so many versions, tweaked and tasted (oh, the tasting!), all to bring you what I truly believe is the absolute best recipe for these decadent lava cookies. My kitchen has practically been a chocolate factory lately, and I’m not mad about it one bit! This recipe is the culmination of all that hard work, and trust me, it’s worth every single chocolate-stained moment. You are going to LOVE these!
Why You’ll Love These Chocolate Lava Cookies
Okay, so besides the obvious (hello, chocolate!), there are so many reasons these Chocolate Lava Cookies are going to become your new obsession. I mean, who can resist a cookie that’s basically a dessert and a show all in one? They’re super impressive, but honestly, they’re not that hard to make. You’ll look like a baking superstar, trust me!
- Pure Chocolate Bliss: We’re talking double the chocolate – rich cookie dough and that incredible molten center.
- The “Wow” Factor: Seriously, watching that warm chocolate ooze out is just *chef’s kiss*.
- Perfectly Balanced: Not too sweet, just intensely chocolatey and satisfying.
- Surprisingly Easy: Don’t let the fancy name fool you; these are totally doable for any home baker.
The Irresistible Charm of Chocolate Lava Cookies
There’s just something inherently magical about these cookies. That first bite, the fudgy exterior giving way to the warm, silky chocolate river inside – it’s a moment! The smell alone fills your kitchen with pure comfort. They’re a delight for all your senses, a little piece of chocolate heaven in your hand. You just have to try them!
Essential Equipment for Perfect Chocolate Lava Cookies
Alright, before we dive into the deliciousness, let’s talk tools! You don’t need a fancy chef’s kitchen for these Chocolate Lava Cookies, just a few basics that make the whole process super smooth. Having the right gear on hand means less stress and more fun in the kitchen, which is what baking is all about, right?
- Mixing Bowls: You’ll need at least two – one for your wet ingredients and one for the dry. Easy peasy!
- Whisk: Great for getting those dry ingredients perfectly combined.
- Baking Sheets: Two of these are ideal so you can get more cookies baking at once. Who wants to wait?
- Parchment Paper: A total game-changer! It prevents sticking and makes cleanup a breeze. Plus, your cookies will slide right off.
Must-Have Tools for Your Chocolate Lava Cookies Adventure
These specific items are truly your best friends for making these molten marvels. Trust me, they’ll make sure your Chocolate Lava Cookies come out perfectly, especially that parchment paper – it’s a non-negotiable for me!
Ingredients for Your Chocolate Lava Cookies
Okay, let’s get down to the good stuff – what you’ll need to make these incredible Chocolate Lava Cookies! Don’t fret, it’s mostly pantry staples, but a couple of things are super important for that perfect texture and flavor. I always say, good ingredients make good food, and that’s especially true for chocolate.
- Unsalted Butter (softened): We’re talking one whole cup! Make sure it’s properly softened, not melted. It’s crucial for creaming with the sugar.
- Granulated Sugar: Just your regular white sugar. It adds sweetness and helps with that lovely crisp-chewy texture.
- Large Eggs: Two of ’em! They bind everything together and add richness.
- Vanilla Extract: A teaspoon of pure vanilla really enhances the chocolate flavor. Don’t skip it!
- All-Purpose Flour: The backbone of our cookie.
- Unsweetened Cocoa Powder: This is where the deep chocolate flavor for the cookie comes from. Use a good quality one if you can!
- Baking Soda: Our leavening agent, helping the cookies puff up just right.
- Salt: A little pinch balances out all that sweetness and chocolate.
- Dark Chocolate (chopped): This is for our glorious lava center! I prefer dark chocolate for a rich, intense flavor, but you can totally use semi-sweet if you like. Make sure it’s good quality chocolate, it really makes a difference.
- Heavy Cream: Just a couple of tablespoons to make that chocolate filling silky smooth and perfectly molten.
Gathering Your Chocolate Lava Cookie Components
Before you even think about mixing, get all your ingredients out and measured. It’s called “mise en place” in fancy chef terms, but for me, it just means less stress and more fun! Make sure your butter is softened, and your chocolate is chopped. These Chocolate Lava Cookies are all about that creamy, dreamy texture, so quality ingredients are key.
How to Make Chocolate Lava Cookies: Step-by-Step Guide
Alright, bakers, this is where the magic happens! Don’t be intimidated by the idea of a molten center; these Chocolate Lava Cookies are surprisingly straightforward. We’re going to break it down into easy, manageable steps. Just follow along, and you’ll have warm, gooey cookies in no time. I promise, the effort is so worth it for that incredible chocolate payoff!
Preparing the Dough for Your Chocolate Lava Cookies
First things first, preheat that oven to 375°F (190°C) and grab those baking sheets – line ’em with parchment paper, you’ll thank me later! In your big mixing bowl, let’s get that softened butter and granulated sugar together. Beat them until they’re light and fluffy, like a sweet cloud! Then, crack in those eggs, one at a time, mixing well after each, and stir in that lovely vanilla extract. In a separate bowl, whisk together the flour, cocoa powder, baking soda, and salt. Now, gradually add the dry mix to your wet ingredients, mixing just until everything’s combined. Don’t overmix, okay? We want tender cookies, not tough ones!
Crafting the Molten Core of Chocolate Lava Cookies
Now for the fun part – the lava! Take your chopped dark chocolate and heavy cream, and melt them together. You can do this in a microwave-safe bowl (just zap it in 30-second bursts, stirring in between) or over a double boiler if you’re feeling fancy. Stir until it’s super smooth and glossy, then let it cool down a bit. Here’s my favorite trick: grab about a tablespoon of cookie dough and flatten it in your palm. Scoop a small spoonful of that glorious chocolate filling right into the center. Now, carefully cover that filling with another small piece of dough and gently roll it into a ball. Make sure that filling is completely sealed in there – we want all that molten goodness to stay put!
Baking and Cooling Your Chocolate Lava Cookies
Once your dough balls are all filled and sealed, place them about two inches apart on your prepared baking sheets. Give them some room to spread! Pop them into your preheated oven and bake for 9-11 minutes. This is crucial: you want the edges to look set, but the centers should still be gloriously soft. Please, please, *please* don’t overbake them, or you’ll lose that molten magic! Once they’re out, let them cool on the baking sheets for a few minutes. That lava center is going to be *hot*, so resist the urge to bite right in! Transfer them to a wire rack to cool completely, or, if you’re like me, enjoy one warm (carefully!) for the ultimate gooey experience.
Tips for the Best Chocolate Lava Cookies
Okay, so you’ve got the recipe, you’re ready to bake, but I’ve got a few extra little secrets for you to make sure your Chocolate Lava Cookies are absolutely perfect every single time. These are the things I learned through trial and error (mostly error in the beginning, ha!) that really elevate them from “good” to “OMG, these are amazing!”
- Don’t Overmix the Dough: I know I said it before, but it’s worth repeating! Overmixing develops gluten, which makes cookies tough. Mix just until combined, no more.
- Chill the Dough (Optional, but Recommended): If you have time, chilling the cookie dough for 30 minutes to an hour can really help. It makes the dough easier to handle and prevents the cookies from spreading too much.
- Quality Chocolate for the Lava: Seriously, use good quality dark chocolate for the filling. It makes *all* the difference in that molten center. Cheap chocolate won’t melt as smoothly or taste as rich.
- Watch Your Oven: Every oven is a little different. Keep an eye on those cookies! The 9-11 minute mark is a guideline, but trust your eyes – edges set, center still soft.
Ensuring Success with Your Chocolate Lava Cookies
The molten center is the star of the show for these Chocolate Lava Cookies, so let’s make sure it’s perfect! The key is to completely seal that chocolate filling inside the dough ball. Take your time, pinch those edges together, and roll it gently. Also, don’t let your chocolate filling get too hot when you’re melting it; let it cool slightly before spooning it onto the dough, or it might be too runny to properly enclose. And again, don’t overbake! That’s the ultimate killer of the lava flow.
Common Questions About Chocolate Lava Cookies
I get asked a lot of questions about these magical Chocolate Lava Cookies, and that’s totally understandable! When you’re dealing with molten chocolate, a few things can pop up. Don’t you worry, I’ve got your back. Here are some of the most common questions I hear, and my best advice to help you out, so your lava cookies are always a triumph.
Can I Prepare Chocolate Lava Cookies Ahead of Time?
Absolutely! You can prepare the cookie dough and even assemble the filled cookie balls, then freeze them on a baking sheet. Once frozen solid, transfer them to a freezer-safe bag. When you’re ready for fresh Chocolate Lava Cookies, just bake them from frozen, adding a few extra minutes to the baking time. It’s a fantastic make-ahead dessert!
How Do I Store Leftover Chocolate Lava Cookies?
If you’re lucky enough to have leftovers (it’s rare in my house!), store your lava cookies in an airtight container at room temperature for up to 3-4 days. To get that molten center back, a quick 10-15 second zap in the microwave works wonders. They’ll taste almost as good as fresh out of the oven!
What If My Chocolate Lava Cookies Don’t Have a Molten Center?
This usually happens if they’ve been overbaked, or if your chocolate filling was too thick (maybe it cooled too much before you put it in the dough). Remember, the key is to bake until the edges are just set and the centers still look soft. And make sure your chocolate ganache for the center is smooth and pourable, not solid. You want that gooey goodness!
Estimated Nutritional Information for Chocolate Lava Cookies
Okay, so I know some of you like to keep an eye on these things, and I totally get it! While I’m all about indulging in these amazing Chocolate Lava Cookies, I can give you a rough idea of what you’re looking at. Just remember, these are *estimates*! The exact numbers can totally change based on the specific brands of butter, chocolate, and cocoa powder you use. Think of it as a general guideline, not a strict rule. Enjoy!
Share Your Chocolate Lava Cookies Experience
And there you have it, folks! Your very own batch of incredible Chocolate Lava Cookies. I just know you’re going to fall in love with these. Now it’s your turn! I absolutely *adore* hearing about your baking adventures. Did you make them for a special occasion? Did they impress your friends? Did you add a sprinkle of sea salt on top? Let me know in the comments below, and don’t forget to share your photos! Happy baking!
Chocolate Lava Cookies
Equipment
- Mixing bowls
- Whisk
- Baking sheets
- Parchment paper
Ingredients
For the Cookies
- 1 cup unsalted butter softened
- 1 1/2 cups granulated sugar
- 2 large eggs
- 1 tsp vanilla extract
- 1 3/4 cups all-purpose flour
- 3/4 cup unsweetened cocoa powder
- 1 tsp baking soda
- 1/2 tsp salt
For the Lava Filling
- 4 oz dark chocolate chopped
- 2 tbsp heavy cream
Instructions
- Preheat your oven to 375°F (190°C). Line two baking sheets with parchment paper.
- In a large bowl, cream together the softened butter and granulated sugar until light and fluffy. Beat in the eggs one at a time, then stir in the vanilla extract.
- In a separate medium bowl, whisk together the all-purpose flour, cocoa powder, baking soda, and salt. Gradually add the dry ingredients to the wet ingredients, mixing until just combined.
- For the lava filling, melt the chopped dark chocolate with the heavy cream in a microwave-safe bowl or over a double boiler. Stir until smooth. Let it cool slightly.
- Take about a tablespoon of cookie dough and flatten it in your palm. Place a small spoonful of the chocolate lava filling in the center. Cover the filling with another small piece of cookie dough and gently roll it into a ball, ensuring the filling is completely sealed inside.
- Place the cookie balls about 2 inches apart on the prepared baking sheets.
- Bake for 9-11 minutes, or until the edges are set but the centers are still soft. Do not overbake.
- Let the cookies cool on the baking sheets for a few minutes before transferring them to a wire rack to cool completely. The lava center will be hot.